**Note** Drivers are required for the printer.
Physical Setup
1. Overview of the cables required to plug in:
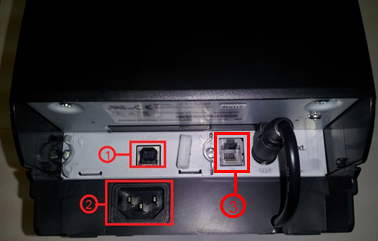
1. The USB port is shown here, plug in one end of the USB cable here and the other end to your USB port on your computer running WooPOS.
2. Plug in the power cord into this location. Plug in the other end into an alternating current socket.
3. Plug in the Cash Drawer cable connector: plug the other end into the Cash Drawer
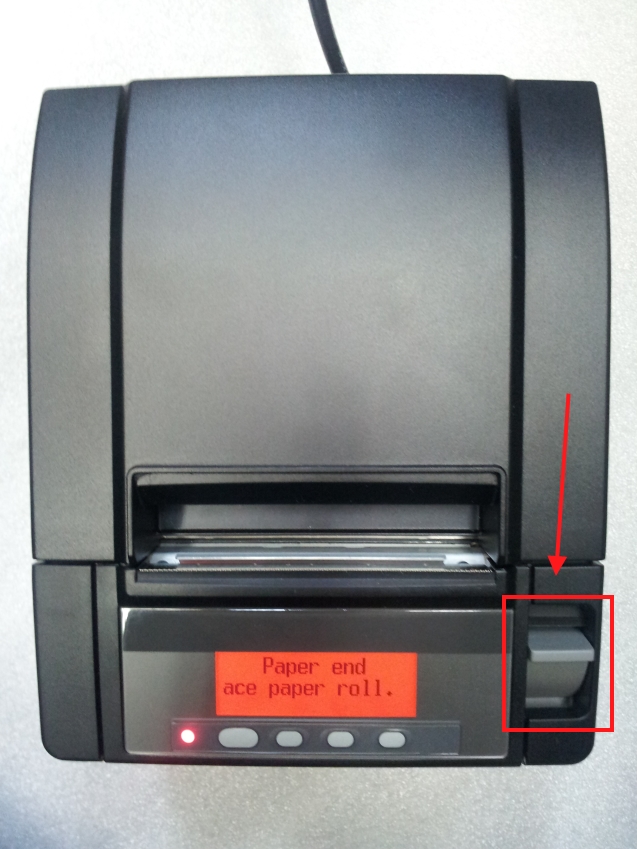
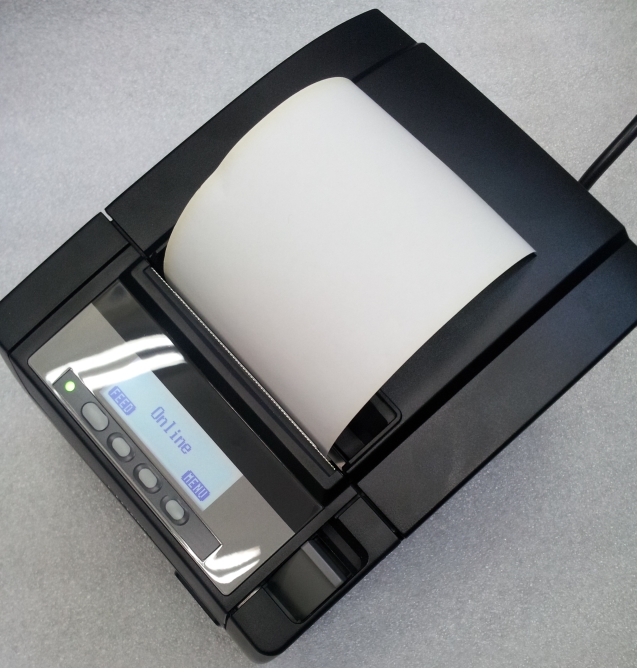
2. Open the lid of the printer by pulling down the switch towards you as shown in the image below.
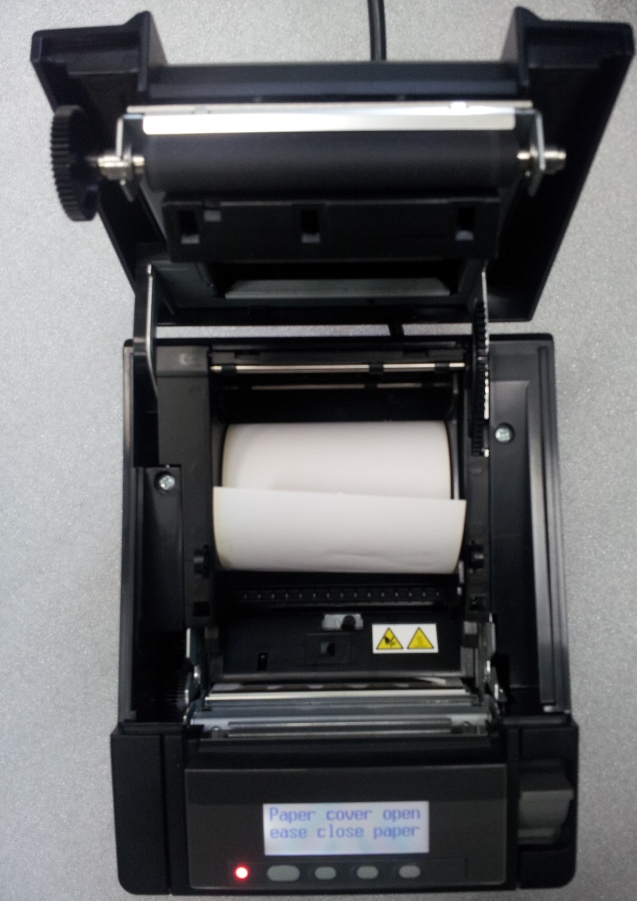
3. Place your receipt paper into your printer as shown below.
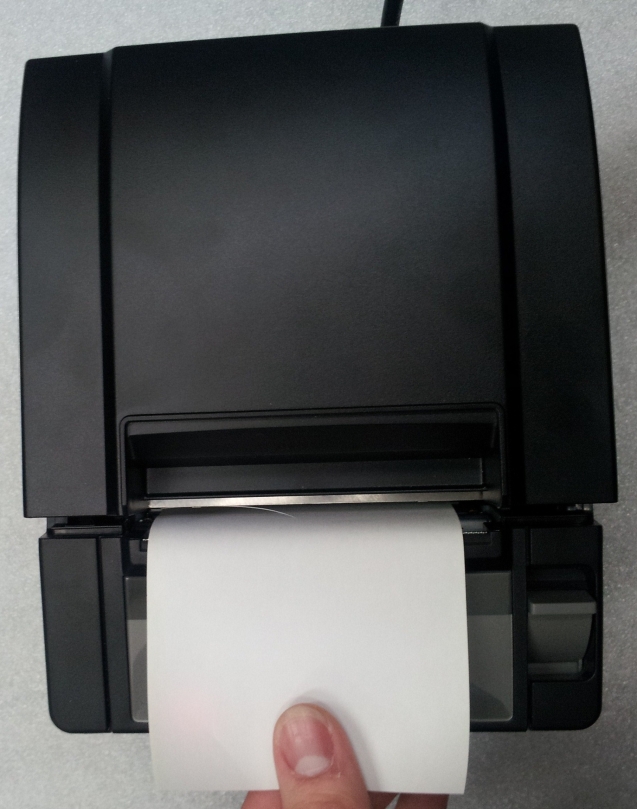
4. Pull the receipt paper out until it exits the edge of the printer.

5. Close the lid of the Citizen receipt printer.
6. Once you have completed the process, your Citizen CT-S801 receipt printer should appear like the image below.
Setup in WooPOS
1. Under the Setup Menu, select the Printers and Local Settings tab. Select the printer for each transaction type.
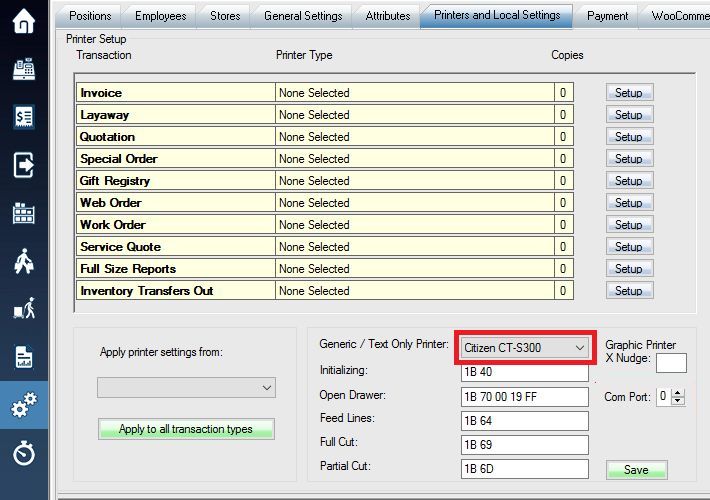
2. Then click next to Generic / Test Only Printer: to open a drop down menu to select the type of receipt printer that you wish to use.
– If you select the Citizen CT S-300 option, it will allow you to use most Citizen and Epson receipt printers.
– If you select the Star SP-200 option, it will allow you to use most Star receipt printers.
More details on multi-copy printing for transaction types.