You can use a serial number to keep track of specific items, by adding a serial number for each item. After scanning the item into the POS screen, you will be required to enter the serial number of the appropriate item. You can also directly scan serial number into Sku box when selling. Once the item is sold, the POS will keep track of the serialized items that are sold along with the ones still in the system.
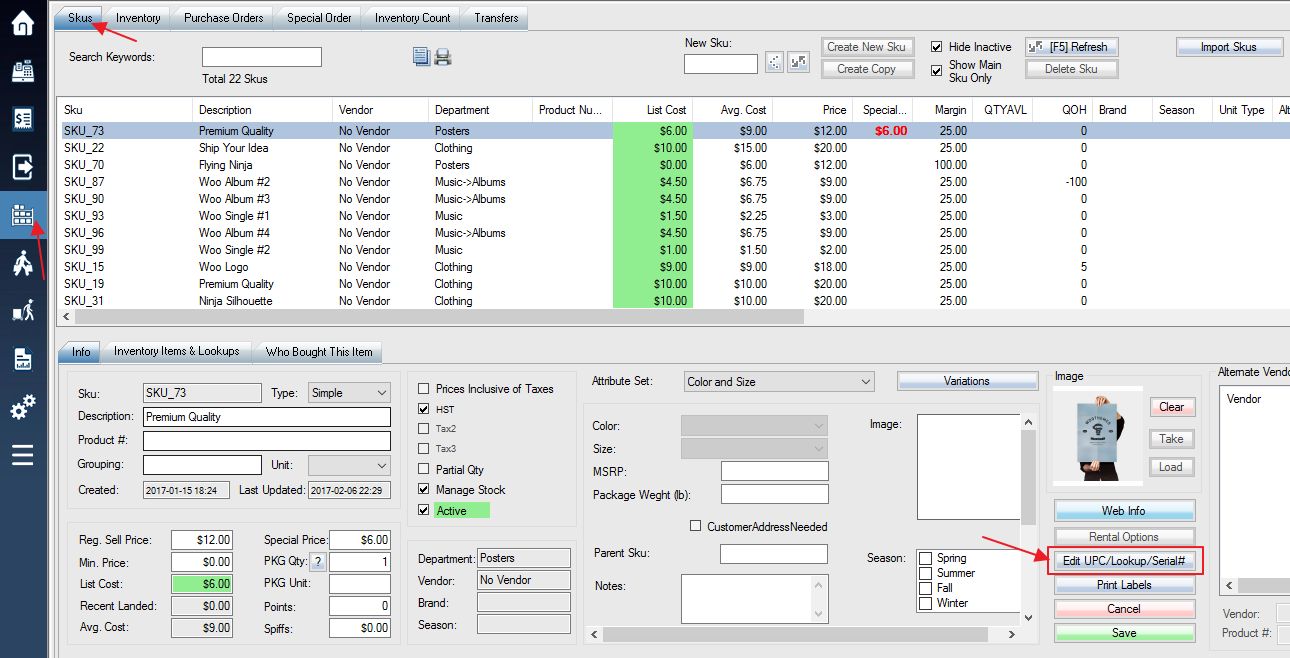
1. Login into the system and access the Products menu. From the Products screen, select the Skus tab and the Edit UPC button.
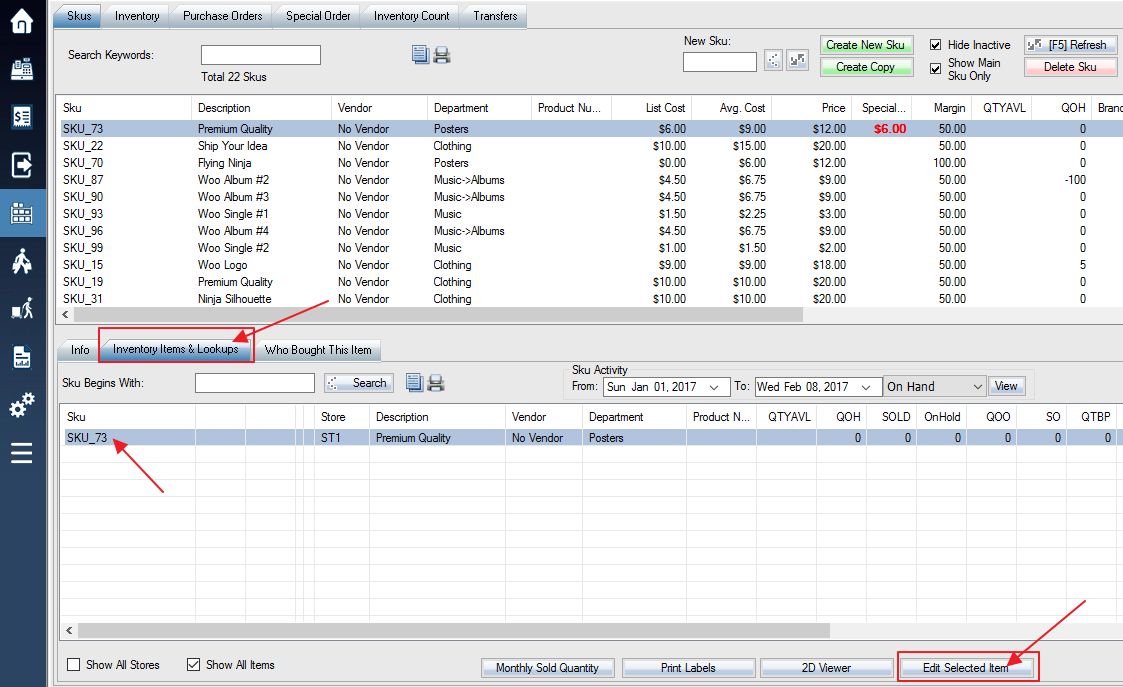
2. You can also select Inventory Items & Lookups tab and press the Edit Selected Item button on the bottom of the screen.
Or Edit items in purchase order receiving.

3. This will bring up the Edit Inventory Items window. In this window select the Serial Number tab.
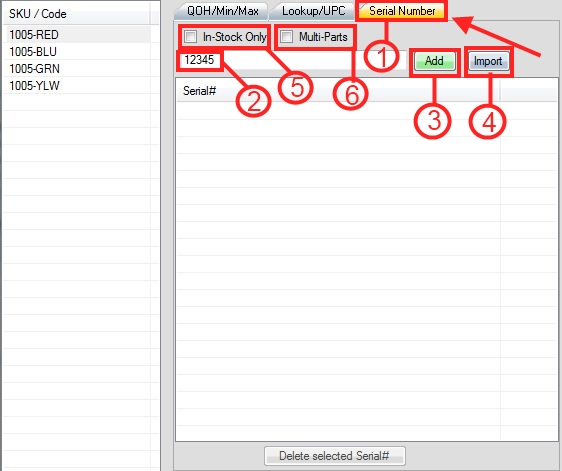
Step 1. Select the Serial Number tab
Step 2. Enter your desired serial number for the particular SKU as shown in the image below:
Step 3. Select Add to add the serial and apply it to the particular SKU
Step 4. You have the option to import serial numbers using the Import button.
Step 5. The In-stock only box when enabled, allows you to only display the serials in stock, excluding serials that were previously sold.
Step 6. The Multi-Parts box when enabled, allows you to enter multiple serial numbers for one particular SKU in scenarios such as where the SKU is similar to a kit or package and contains more than one item that is sold, and multiple serials can be used to apply an individual serial to each item included in the package sold.
4. When selling in POS, the system will prompt to enter serial number. You can also scan the serial number directly into the SKU/Barcode box.
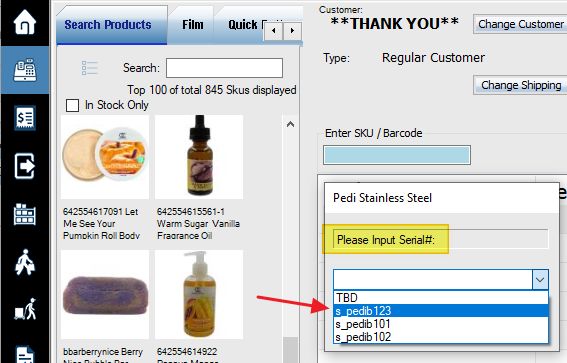
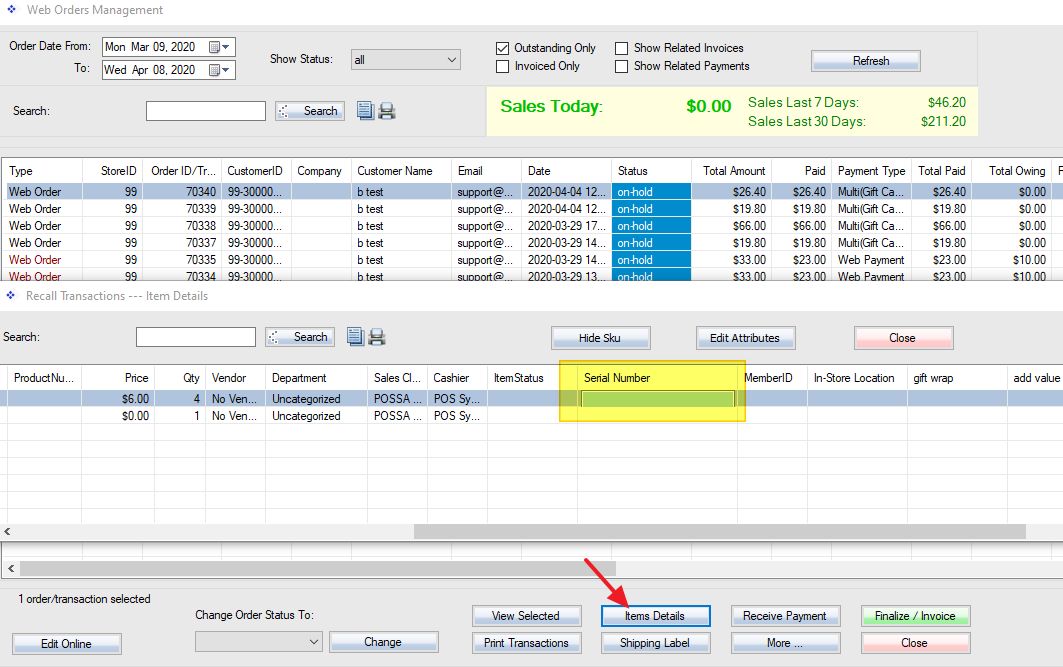
You can also change serial number in web order or recall transaction screen.