To get web access to WooPOS, at least one Windows computer needs to have the WooPOS Windows Desktop app installed.
Locate the “Cloud Sync” tab in Setup.
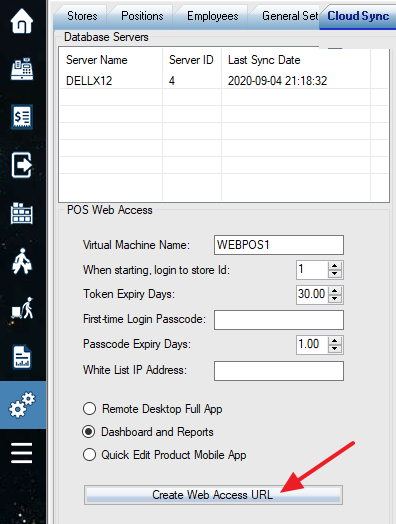
Virtual Machine Name: this will be the computer/till name for log and billing purposes. One Virtual Machine Name can be used on multiple devices, but only one concurrent connection is allowed.
Token Expiry Days: the accessing URL will be valid within the period of time. Set to 999999 If you don’t want the URL to be expired.
First-time Login Passcode: enter this code when the first-time login. Leave this blank to disable this security feature. You can set up your own passcode.
White List IP Address: input allowed client IP addresses here. Leave this blank to disable this security feature.
Select an App type from the radio buttons list. Click “Create Web Access URL”.
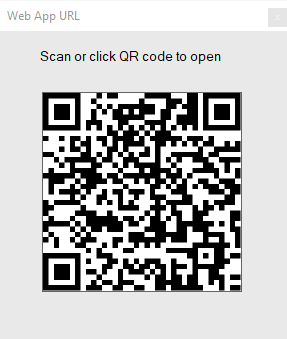
Click the QR code to get the web app URL.
The “Quick edit product” web app can be launched from a web browser directly or from the Android Inventory count app if you want to use the phone camera to scan the barcode.

Dashboard overview:
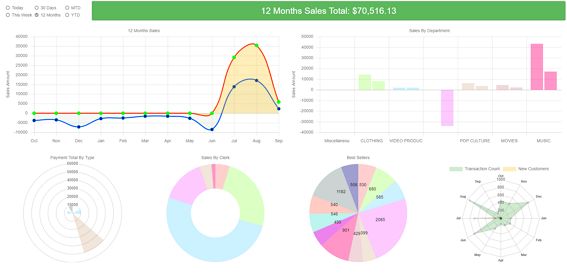
To set up your own report buttons, check here.

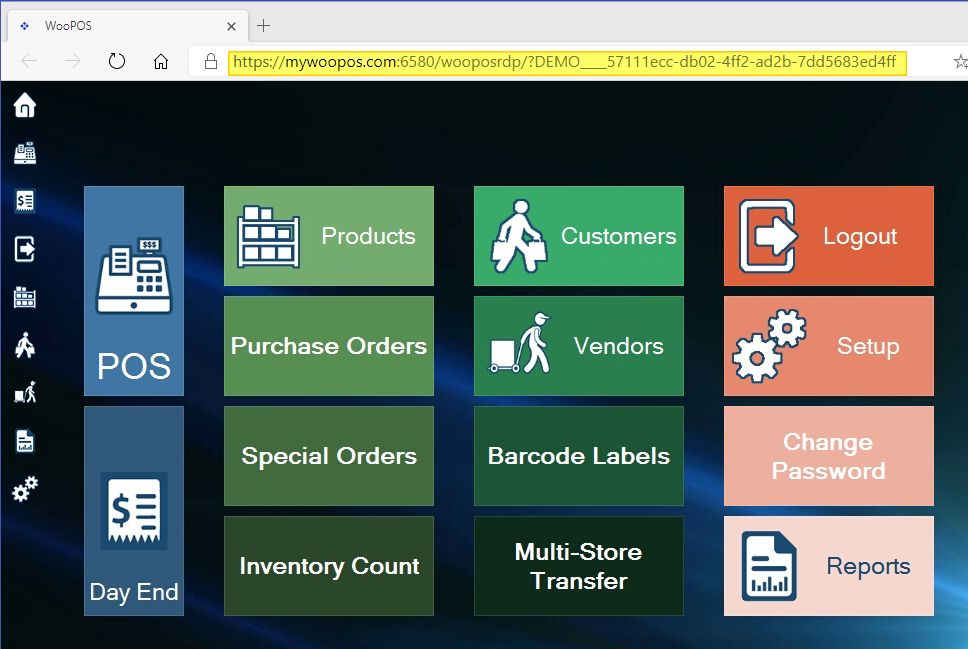
Remote desktop app overview: