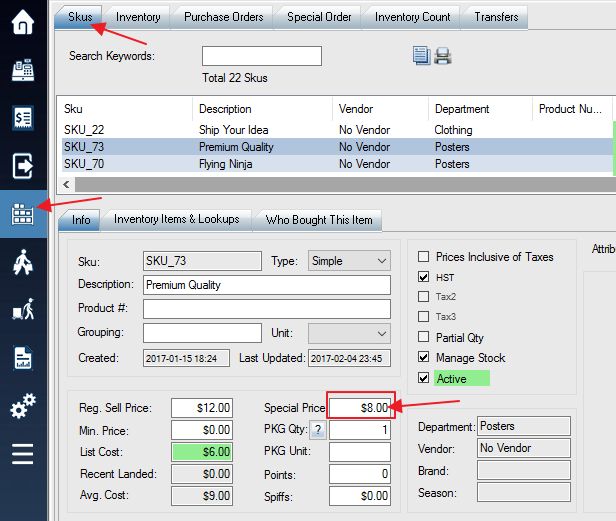
1. Login into the system and access the Products menu. Select the Skus tab.

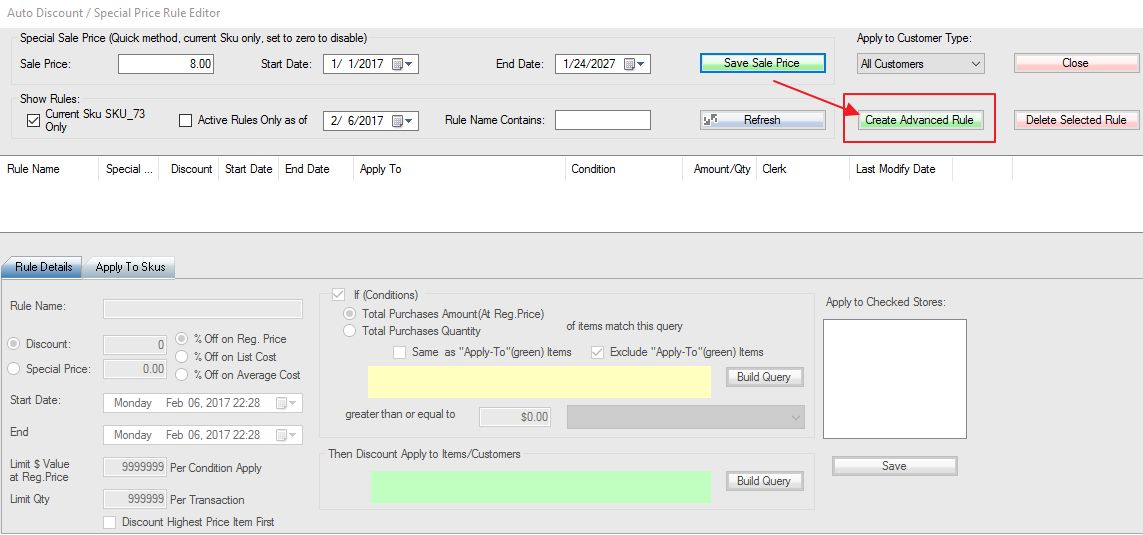
2. Click Special Price Box. This will bring up the Auto Discount Rule Editor window.
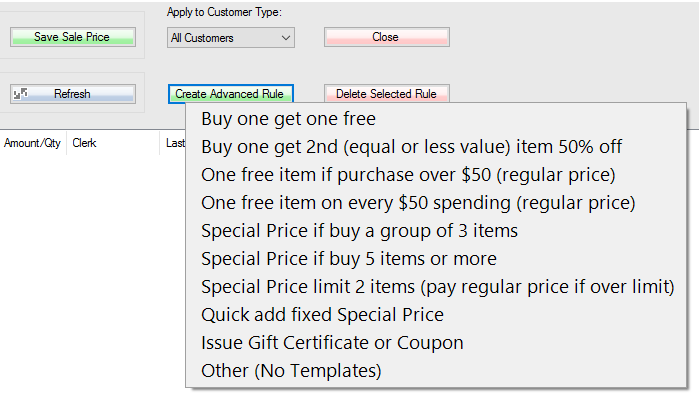
3. You can create more advanced pricing rules using the Create Advanced Rule button, which will open a popup list of commonly used discount rules, as well as the option for a blank rule.

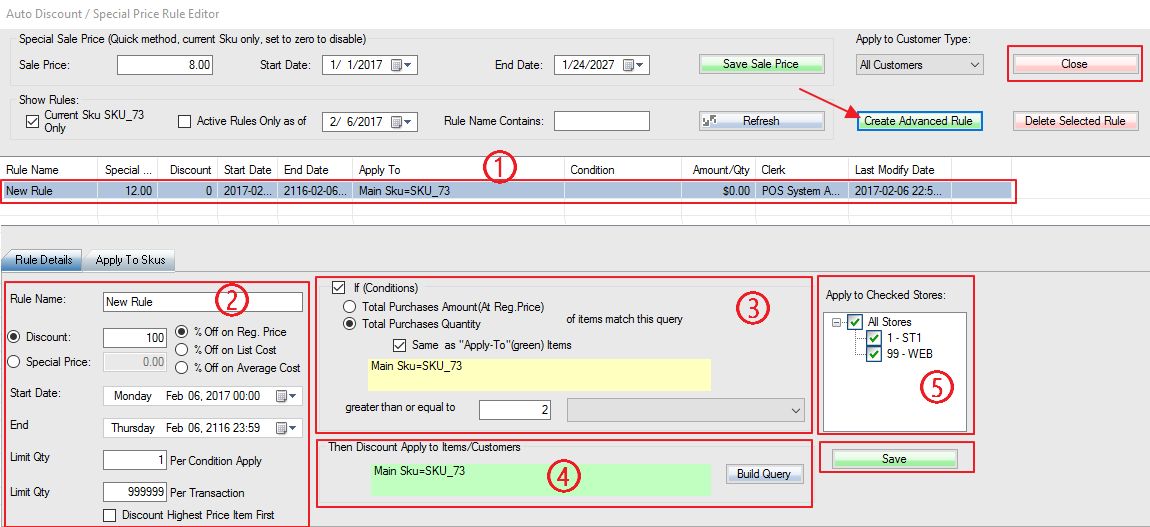
4. Once you have created your pricing rule you can change the pricing values and rule conditions.
Step 1: Once you create a new rule, it will appear in this list. Select it to edit the settings.
Step 2: This section allows you to name the rule, designate whether the discount is a percentage or set value, the date range for the rule, designate a limit for discount value, limit the quantity sold per transaction, and whether to only discount the highest priced item first.
Step 3: You can apply “If conditions” using the query builder to change the special price for certain scenarios. For example, you can create a rule that states “If Total Purchase Amount = $5.00 or greater, then give extra 10% discount.”
Step 4: This section applies the special price to a designated choice of products using the query builder.
Step 5: Here you can apply the rule(s) to all or some of your stores. Note: The rules with “If conditions” will NOT work for the web store. You may need to add additional settings or plugins to the website.
Step 6: Once you are satisfied with your new pricing rules, use the Save button in the bottom right corner to save your changes, and exit the Discount Rule window using the Close button on the top-right corner.
To discount on weekdays, put the keyword “Every …day” (eg, Every Tuesday, Friday) in the rule name.


