Log in to the POS section and click the Scanner/File button that is highlighted in the following screenshot.
![]()
The following window will appear. Select the Scanner/File button.
![]()
The following window will appear.
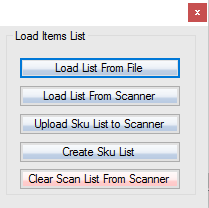
1. Load List From File: This option will allow you to navigate to a file located on your computer or scanner. The txt file contents should look like this:
SKU_15,1
SKU_34,2
2. Load List From Scanner: This option will allow you to load a list of scanned items from an inventory scanner.
3. Upload SKU List to Scanner: Select this option to upload a list of available items to the scanner so it is it able to register the codes you are scanning. Scanning will not function unless you upload the list of SKUs first.
4. Create Sku List File: Select this option to manually generate the skulist.txt file that can be manually populated on the inventory scanner using file manager.
5. Clear Scan List From Scanner: Clears the list of scanned items from the scanner. This should be done between transactions to clear lists of previously scanned items.
***For this method please chose option 1 or 2, Load List From File or Scanner
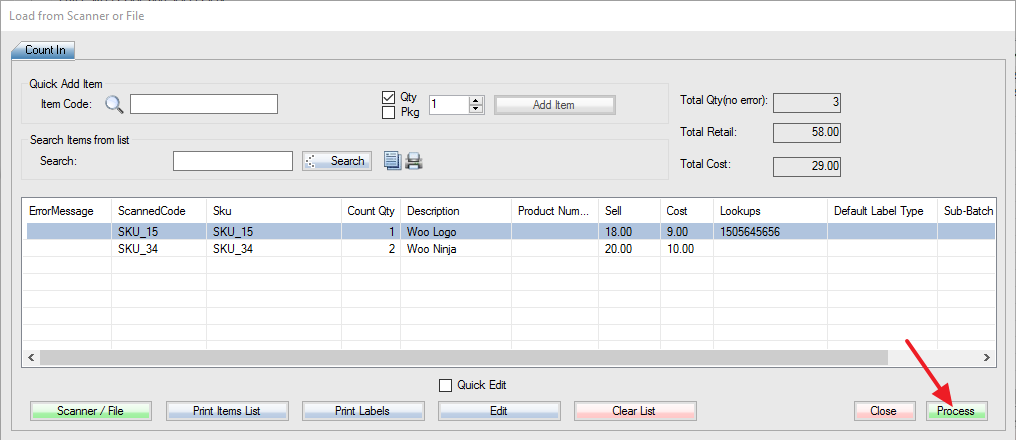
Once the file loads the items will appear as in the picture below. To process payment, click the Process button, and the items will be pulled into the Point of Sale.
Step 6. Once back in the POS window, proceed to payment as normal.
