Preparing and Setting up the Net Citizen S-801 Ethernet receipt printer:
1. Overview of the back of the printer:
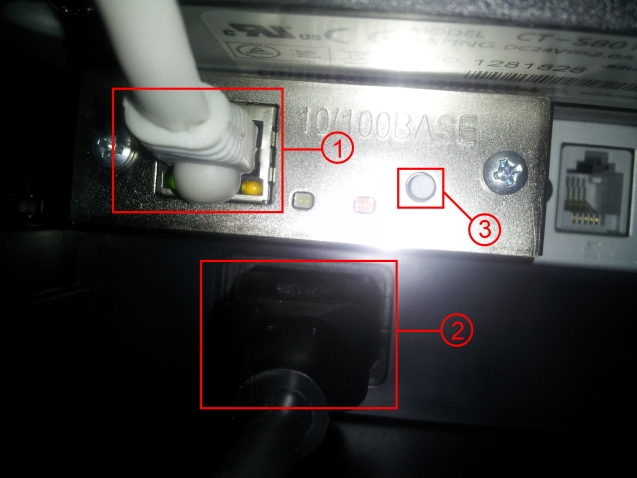
Step 1: Plug in your ethernet cable into this slot, and the other end goes into your modem/router/network switch etc that will connect it to the local network.
Step 2: Plug in the power cable into this slot, and the other end goes into an A/C outlet.
Step 3: Press this button to print out the network information from the receipt printer (make sure to put receipt paper inside first) and then you can locate the assigned IP for the printer in the following step.
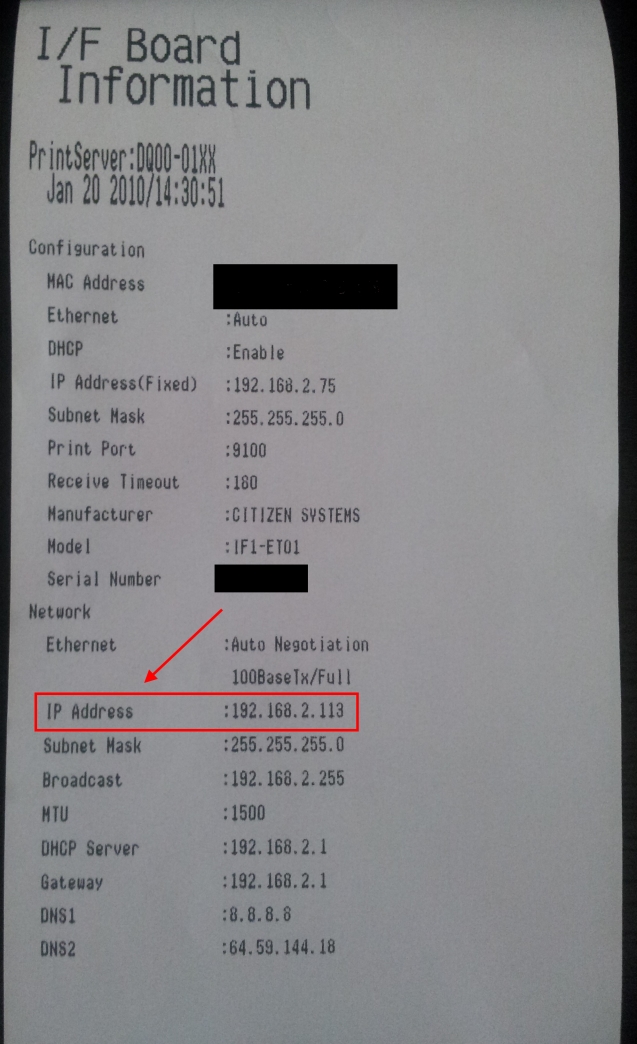
2. The printer will print out a receipt that looks similar to the following. Locate the IP Address field and write down the information for it (in this case it is 192.168.2.113).
3. Overview of the printer setup menu:
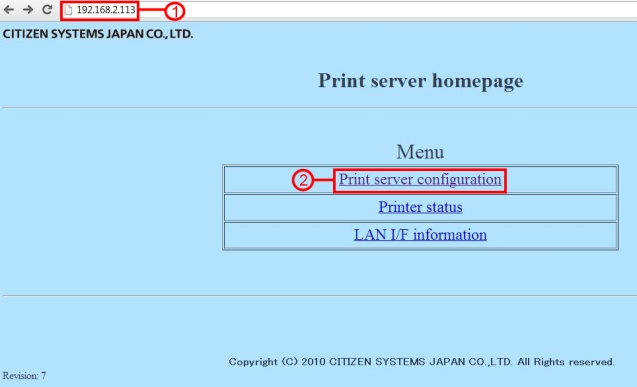
Step 1: Open an internet browser, and enter the IP address to the URL bar that you wrote down earlier from the receipt here.
Step 2: Next, select the Print server configuration option.
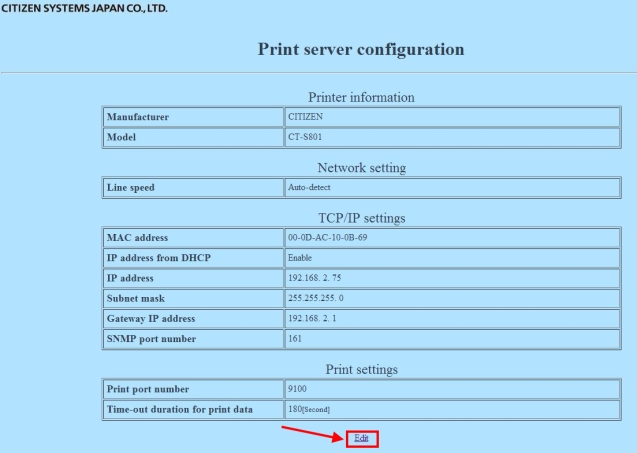
4. In the following screen, select the Edit option near the bottom of the screen.
5. Overview of Print server configuration:
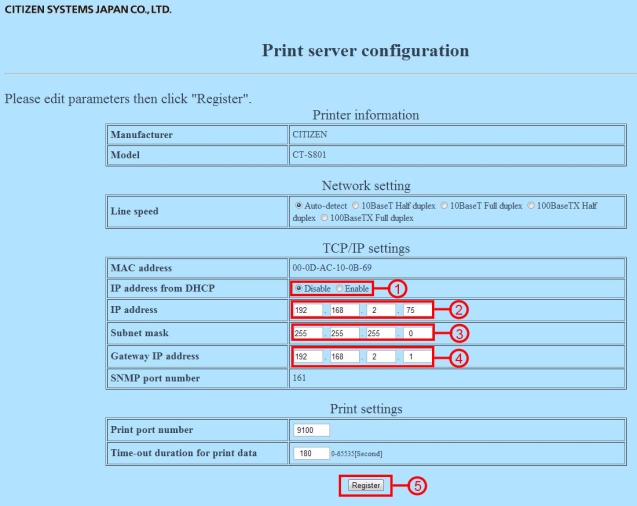
Step 1: For the IP address from DHCP field, select the Disable option.
Step 2: For IP address field, enter any IP address value that is not being used by another device. An example would be 192.168.2.XX with the final two digits (XX) being any value that you want. Write this new IP address down and save it for section 11.
Step 3: Leave Subnet mask the same as 255.255.255.0
Step 4: The Gateway IP address should be 192.168.2.1
Step 5: Finally, select Register to save the changes. It should take a few moments to register.
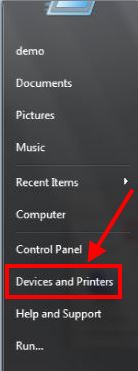
6. Next go to the start menu of your computer (bottom left corner of the desktop screen) and select Devices and Printers from the window that appears.
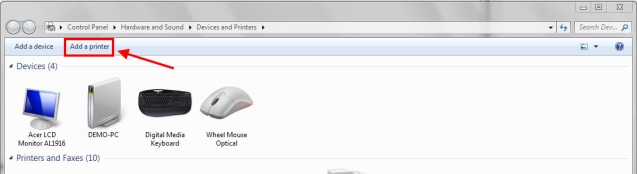
7. Select Add a printer near the top left corner of the window that appears. Or alternatively, you can right click anywhere on the screen and select Add a printer from the menu that appears.
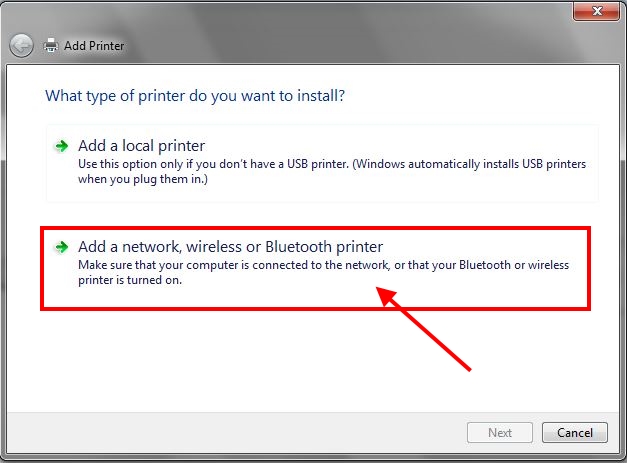
8. Next, select Add a network, wireless, or Bluetooth printer.
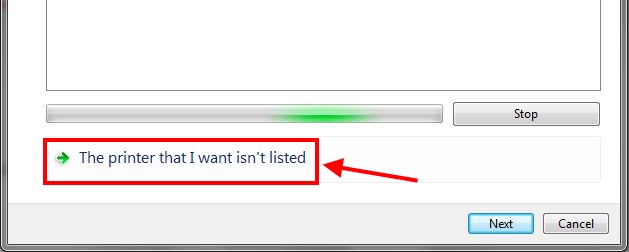
9. Select The printer that I want isn’t listed near the bottom of the window that appears.
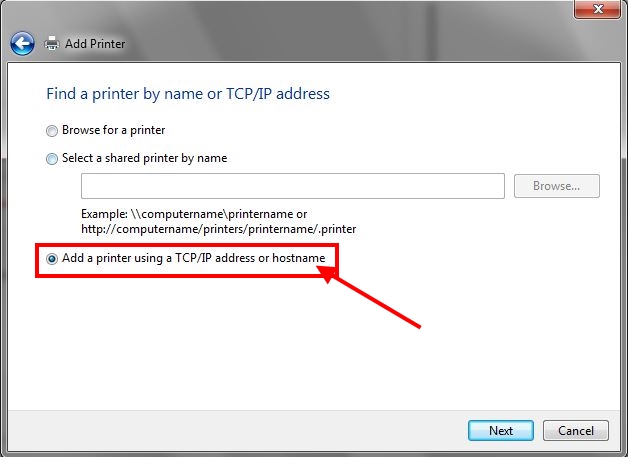
10. Select Add a printer using a TCP/IP address or hostname.
11. Overview of next Add Printer window that appears:
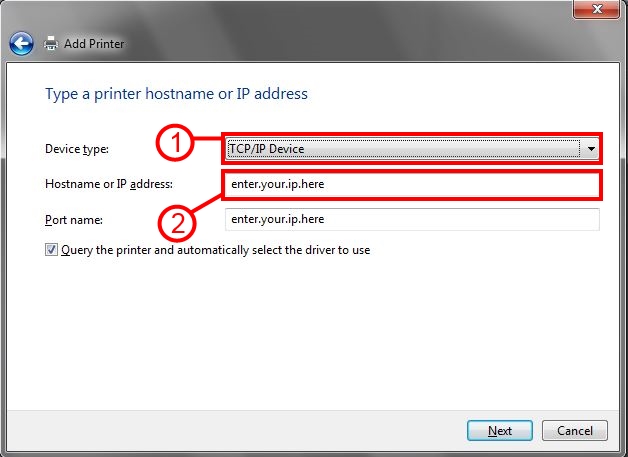
Step 1: Under the Device type: field, Select TCP/IP Device.
Step 2: Next, enter the IP address that you wrote down in section 5 step 2. The Port name: field will automatically be filled, do not change the information for it.