Once your purchase order has arrived at your store, you have to use the receive PO function in order to enter it into inventory.
One way of receiving your purchase order, is via Item Quantity Only. This allows for you to skip all the cost editing and changes, and simply receive your items on the purchase order solely based on their quantity.
1. If there is no currently open order, select the order (double click the order or click Edit Selected Order) to which you would like to receive items.
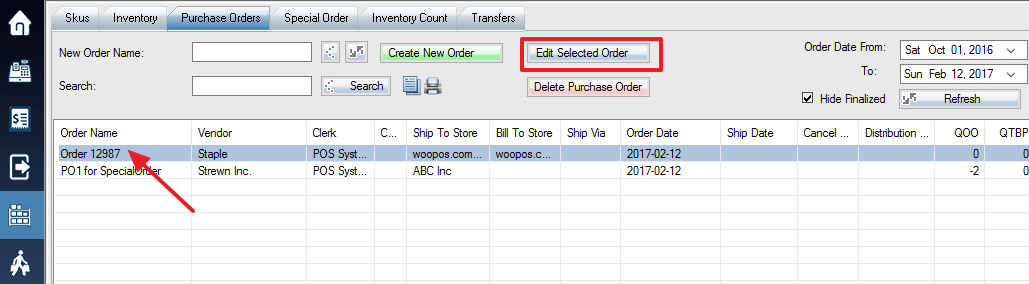
2. Select the Order and Receive tab. The window will now display a list of all items included in the purchase order. Press Receive to bring up a list of ways to receive your items.
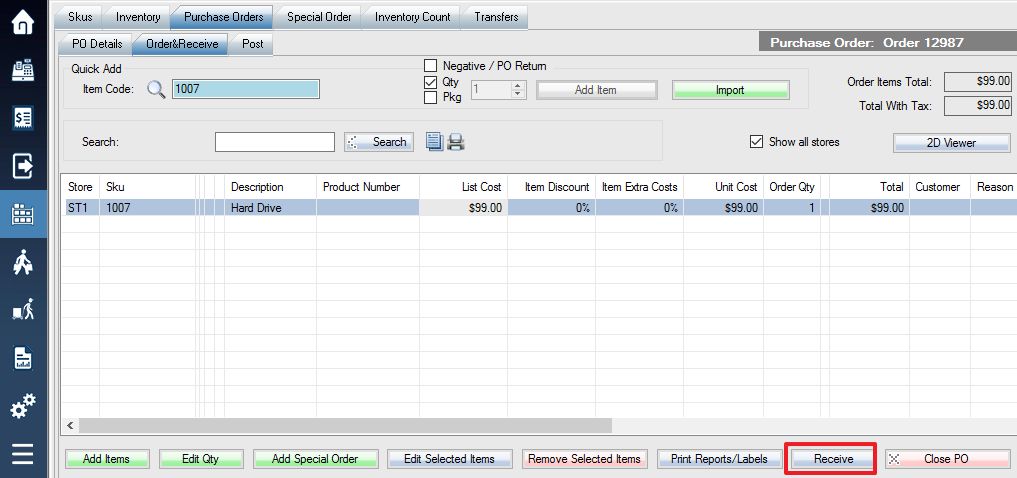
3. A small menu will pop up from the receive button offering you options for your receiving methods.
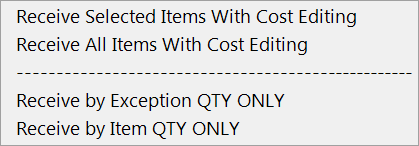
Select Receive by Item QTY ONLY to receive the items on the list without anything including cost editing.
A window to receive your purchase order items without cost editing will appear:
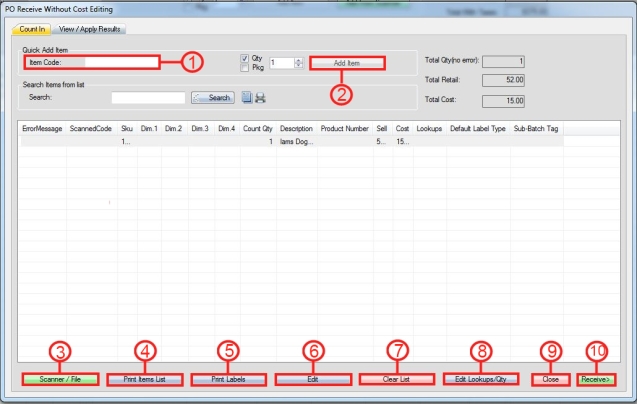
Step 1: Use the Quick Add Item option to quickly and manually add your SKUs to the purchase order for receiving.
Step 2: If having used the Quick Add Item option, specify the quantity to the right and then select Add Item.
Step 3: Use the Scanner / File option to load a list of SKUs from your scanner.
Step 4: The Print Items List option will open up a report displaying all the items that you will receive.
Step 5: The Print Labels option allows you to print labels for your purchase order directly.
Step 6: The Edit option will allow you to change the code, quantity, and sub-batch tag of each SKU.
Step 7: The Clear List function will clear your entire list of SKUs that you have already selected.
Step 8: Edit Lookups/QTY will allow you to edit the lookup values of the SKUs such as their UPC or serials.
Step 9: Close will close the entire window.
Step 10: Once you have made all your desired changes, select Receive> to finalize and receive the order.
In the PO Receive window, select Receive (Not Post) in the bottom right corner.
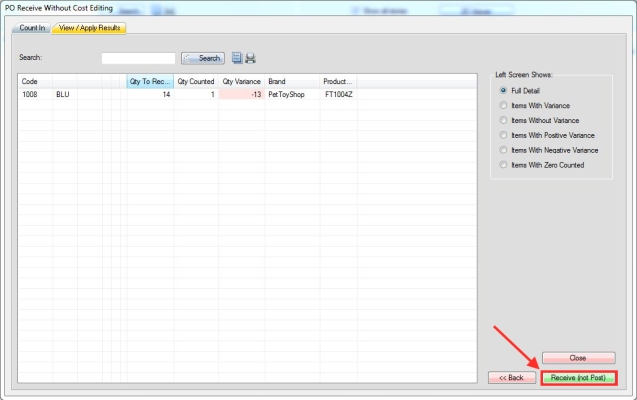
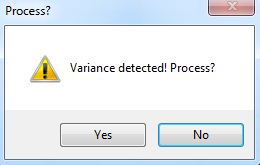
If there is a variance detected, a process window will appear prompting you to continue, select Yes, or No if you wish to first remove the variance. Then select Yes again to the second prompt that appears stating that the process will be permanent and cannot be reversed.
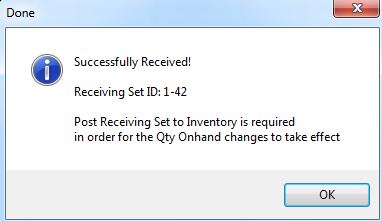
If the purchase order is successful, a window with the details will appear below as shown in the image below:
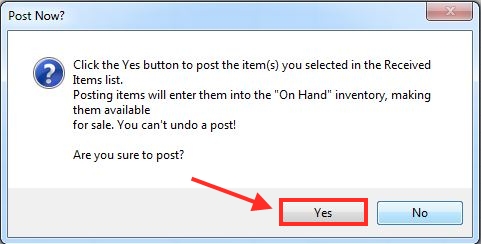
To Post the purchase order:
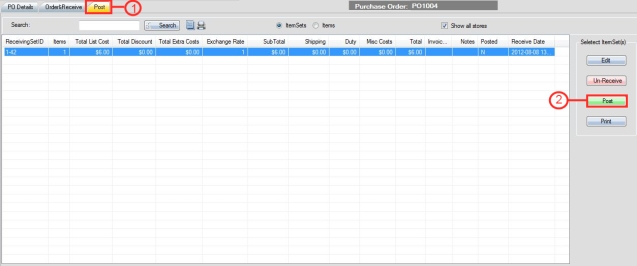
1. Select the Post tab,
2. Then select your pending order, and select Post on the right-hand side of the screen.
Select Yes in the window prompt that appears