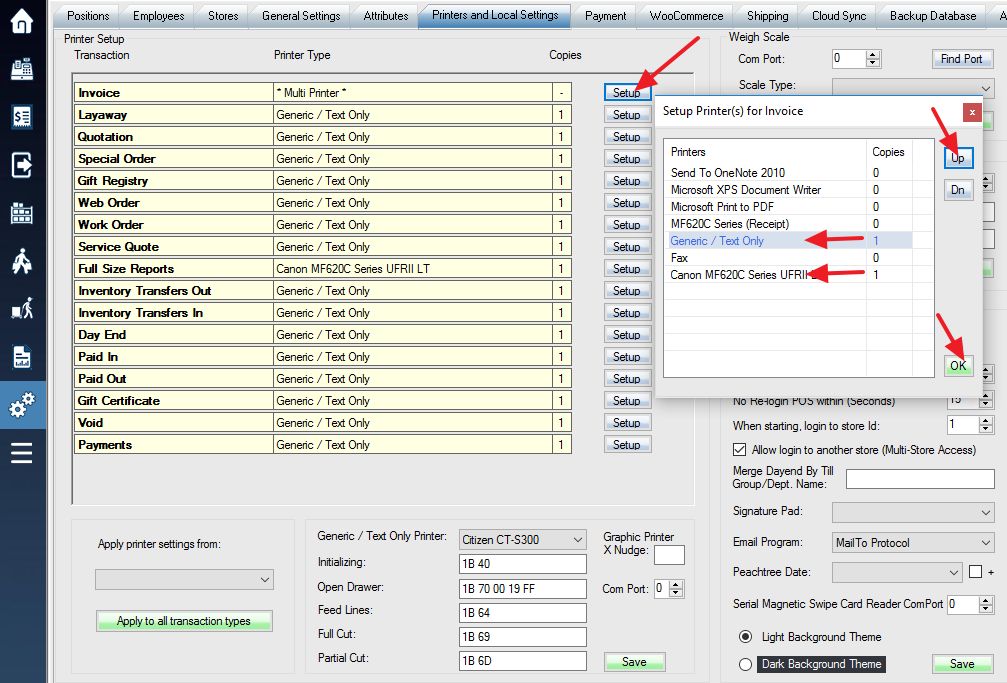
Printer Setup can be done to enable the cashier to choose which printer they want to print to at the end of the transaction. This can be useful to specify different printers to print based on the payment type or type of customer or items purchased. First, navigate to Printers and Local Settings and select which printers you want to be available to select from for each type of transaction printing instance.
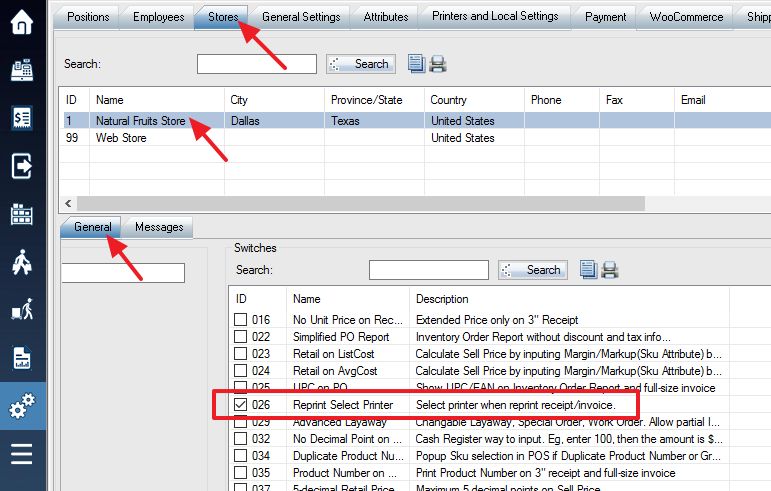
Next, you will navigate to Store Settings, select the store and find the software switches on the bottom right side. Look for switch 026 titled, “Reprint Select Printer”. Enable this switch and click on Save Store to make sure this switch is saved as enabled.

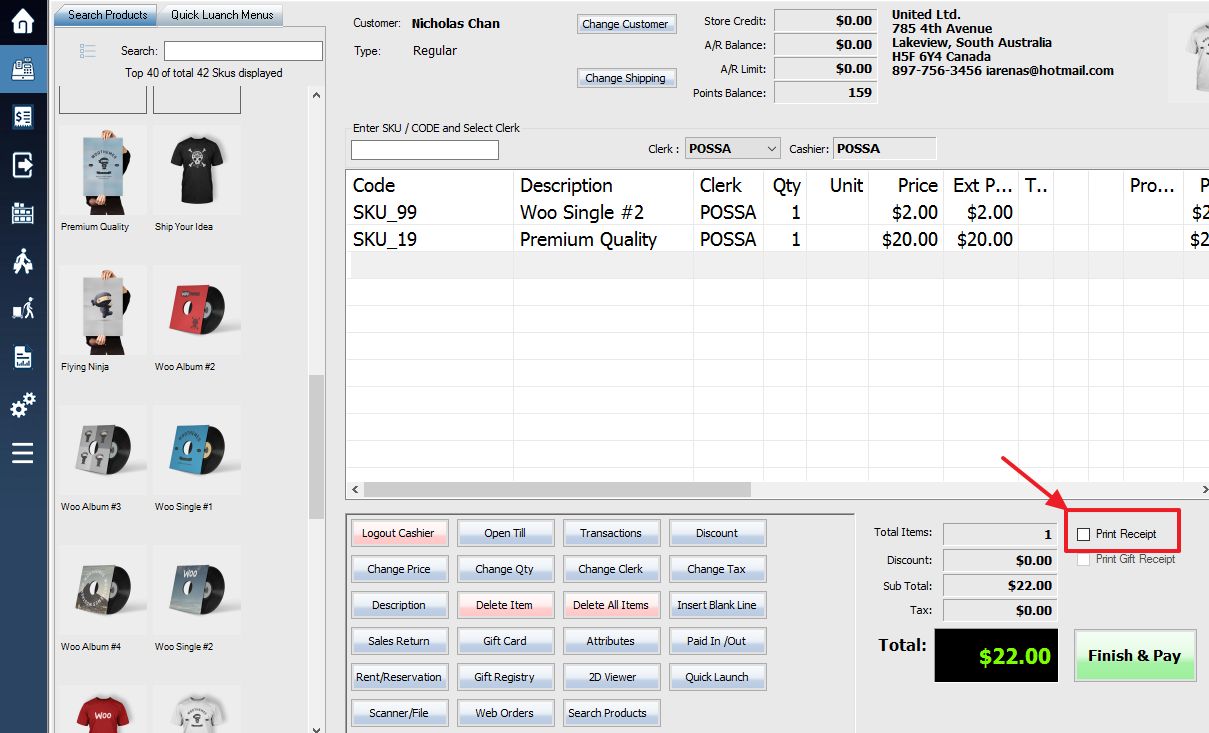
Go to the POS transaction screen, find and uncheck the Print Receipt checkbox. Disabling this checkbox prevents the receipt from printing on its own to both printers after the transaction is complete.
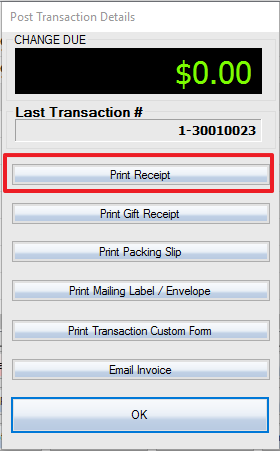
The next time a transaction is completed notice that the receipt won’t print on its own, though at the post transaction details menu there is an option that can be chosen to prompt the receipt to print.

When the Print Receipt button is pressed the cashier will be presented with the options to choose which printer that they want the receipt to print to.

The choice of printers and the prompt to not print a receipt on its own will have to be enabled on each till individually. You only have to enable the store settings of switch 026 once.
To reprint a transaction after it’s done, click here.


