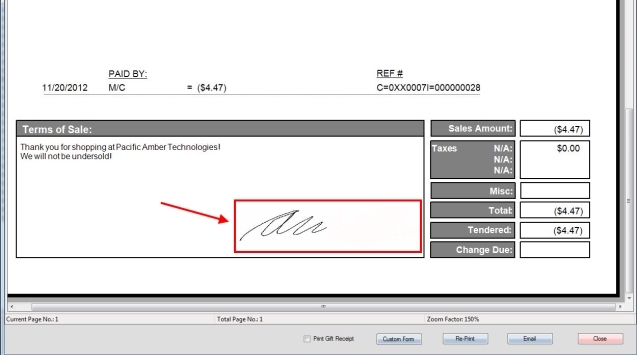
WooPOS gives you the ability to use a Topaz Signature Pad to get a customer’s signature during a transaction, or after a transaction has already been made.
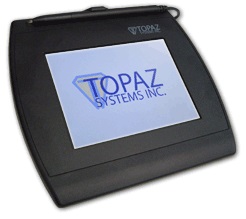
Signing Area Size: 4.6″ x 3.4″
Data Conversion Rate: 377 pps
Resolution: 410 Ppi
1. Go to the Topaz website and download the appropriate installation drivers for your model.
2. Run the SigPlusColor57.exe file that you download from the website and it will take you through the installation process. If you are connecting your Topaz signature pad by USB then select the HSB (USB Connection) option. You will be asked if you would like a shortcut of Demo Ocx.exe and TopazColorDemo.exe placed on your desktop. These are great tools that you can use to easily test to see if your signature pad is working.
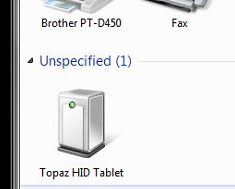
3. When the installation is complete you can plug in your Topaz signature pad. It should automatically install the new drivers and display their logo on the screen. You can use the demo programs included to test its functionality. It might show it as above under the Hardware and Sound Settings.
4. To get WooPOS working with your signature pad Log into the system, and then access the Setup menu.
5. Overview of Setup menu:
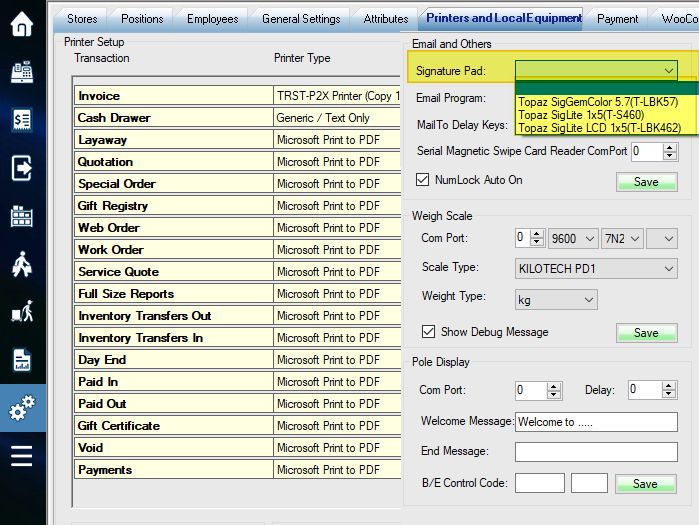
Step 1: Select the Printers and Local Settings tab.
Step 2: For the Signature Pad field, select Topaz SigGemColor 5
Step 3: Select the Save option to complete the setup.
6. Overview of the Recall Transaction screen:
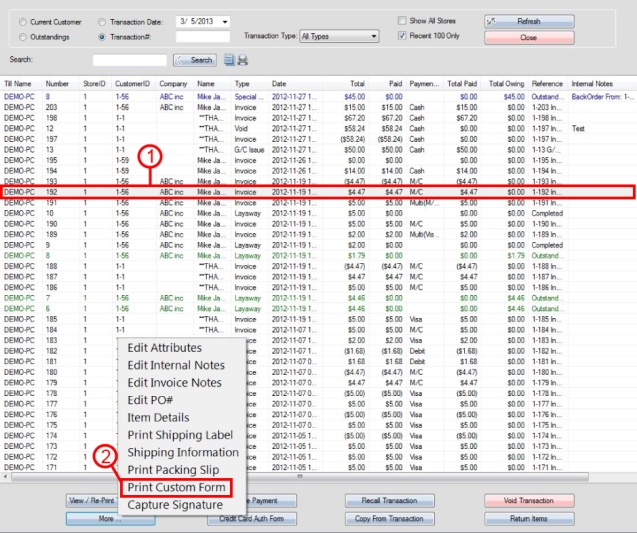
Step 1: Select the Invoice that you want to sign a signature for.
Step 2: Select the More option in the bottom left corner of the screen, and then select Print Custom Form from the menu that appears.
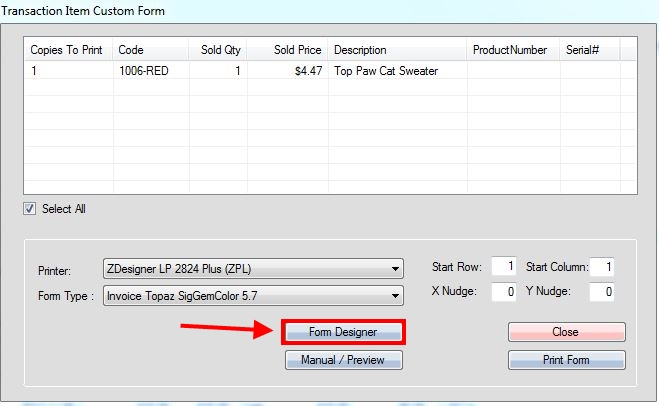
7. Select Form Designer.
8. Overview of the Label Designer window:

Step 1: Select Create New Blank Label.
Step 2: For the Label Name field, type in “Invoice Topaz SIgGemColor 5.7(T-LBK57)” or “Layaway Topaz SigGemColor 5.7(T-LBK57)” without the quotations, depending on whether you are using a signature for either an Invoice or Layaway. If both, then create two different labels with each of the names.
Step 3: Select Create to complete the label and enter the editing menu.
9. *Optional once label is created* If you want to return and edit your label again:

Step 1: Select the Edit Existing Label option.
Step 2: Select the name of the Topaz label that you created in the previous step.
Step 3: Select the Edit option to enter the editing menu again.
10. Overview of the label designer:
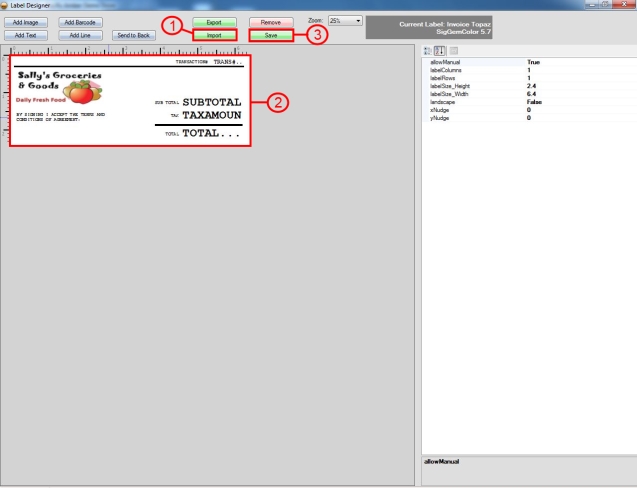
Step 1: If you want to use the same template as shown in the example, then download this template, and then select Import (as shown in the image above) to find the downloaded template on your computer and select it.
Step 2: Once the template has been imported, or if you have created your own, you can still edit it
Step 3: Select Save to complete the changes you made to the label.
11. Next, you can capture a signature for already existing Invoices or Layaways (remember to use the proper corresponding label type as Invoice or Layaway):
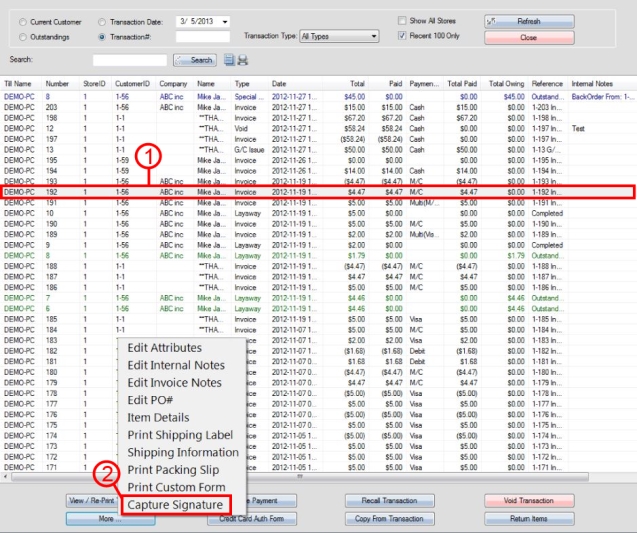
Step 1: Select an Invoice or Layaway from the Recall Transaction screen.
Step 2: Select the More option in the bottom left corner of the screen, and then select Capture Signature from the menu that appears.
12. A window like this or similar to this (if you have changed it) will appear, simply sign on the line using the Topaz Signature Pad after following these instructions:
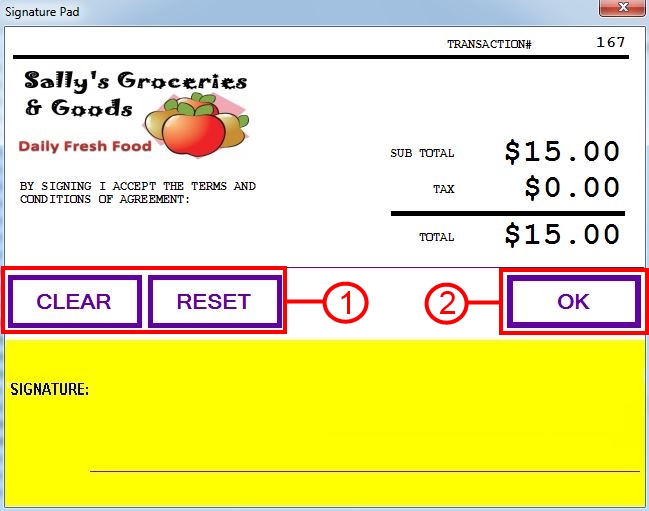
Step 1: The Clear option clears the signature and the Reset option is for your use only, and it resets the entire Topaz signature pad.
Step 2: Select OK to complete the signature.after it has been signed by the customer.
13. For the rest of your transactions made, the signature window will appear above prompting the customer to sign during a transaction.
14. You can view the signature by recalling a transaction and double-clicking on it to see the invoice. Simply scroll down to the bottom of the invoice to view the customer’s signature.

