**The general purchase order guide can be found here.**
Once your purchase order has arrived at your store, you have to use the receive PO function in order to enter it into inventory.
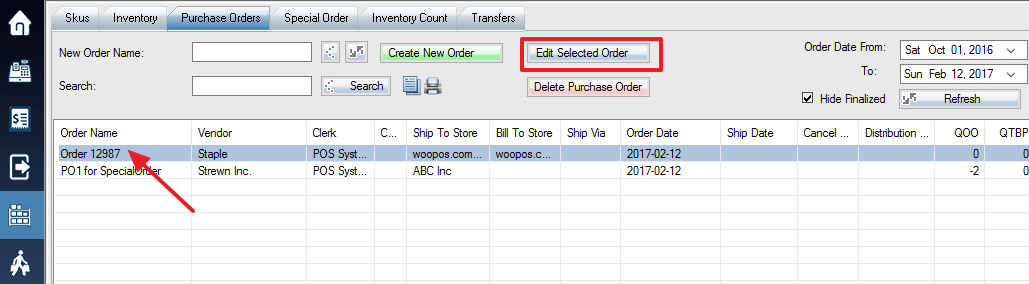
1. If there is no currently open order, select the order (double click the order or click Edit Selected Order) to which you would like to receive items.
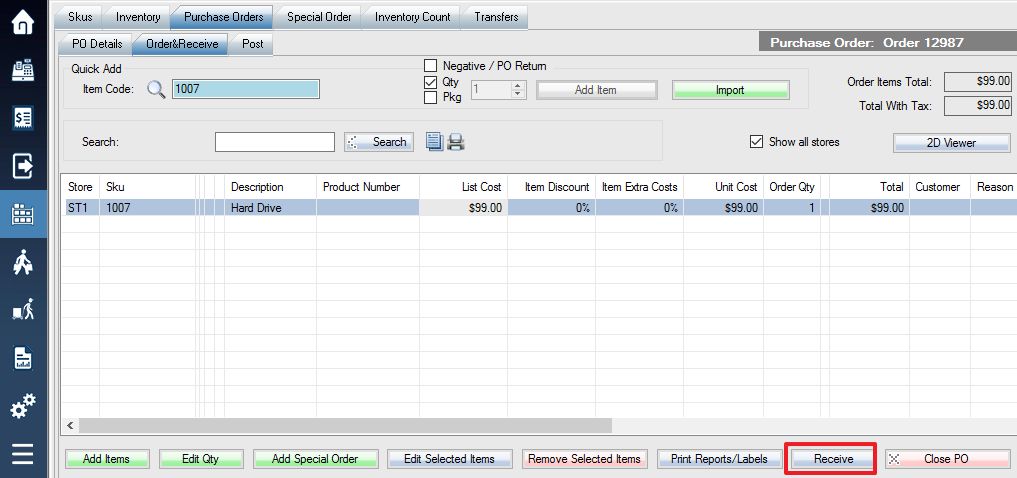
2. Select the Order and Receive tab. The window will now display a list of all items included in the purchase order. Press Receive to bring up a list of ways to receive your items.
3. A small menu will pop up from the receive button offering you options for your receiving methods.
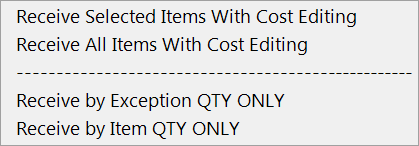
Select Receive All Items With Cost Editing to receive all the items on the list. To receive only certain items from the order, select the items you wish to receive, press the receive button, and then select Receive Selected Items With Cost Editing.
**Optional**
– Receive by Exception QTY ONLY
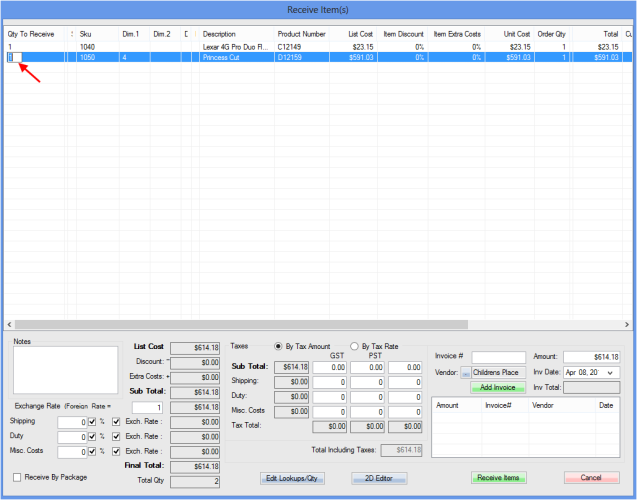
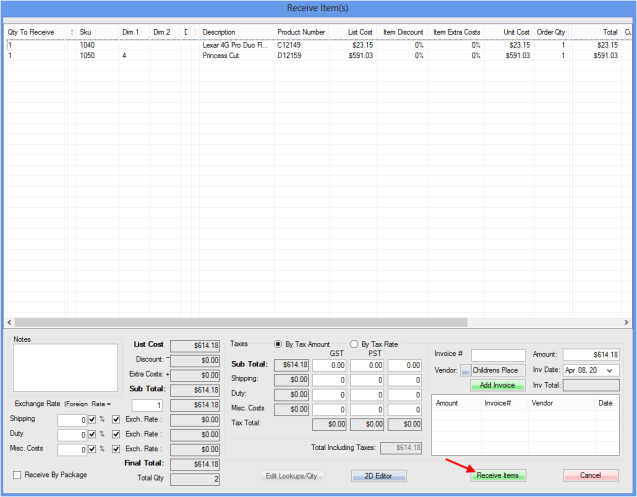
4. A Receive Item(s) window will then be displayed listing your chosen items.
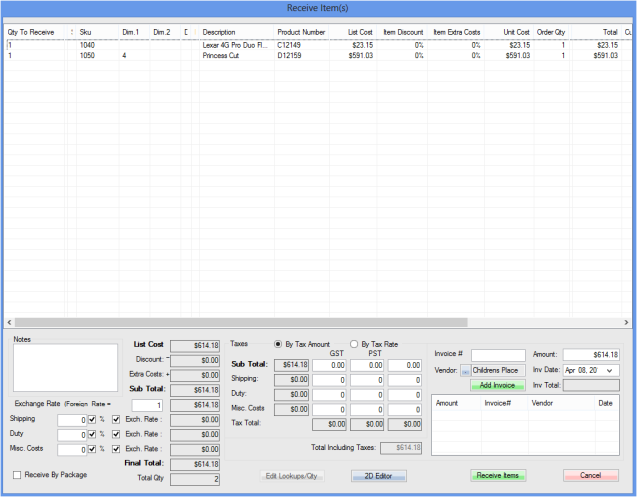
5. To edit the quantity of items received, select the amount in the Qty To Receive column and change it to a new value.
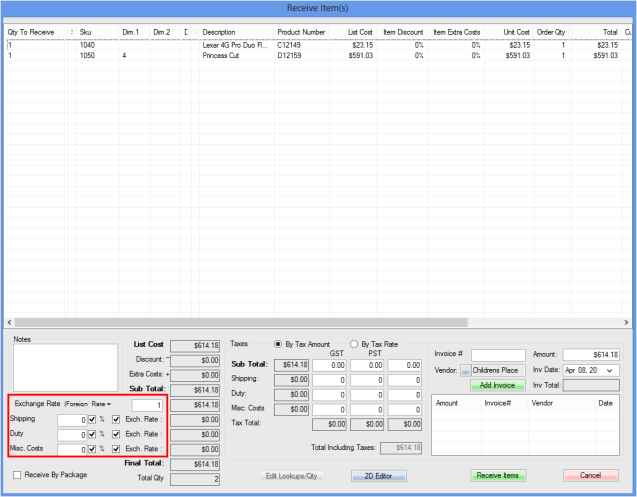
6. Use the box in the lower left corner to set shipping, duty, and misc costs, as well as an exchange rate if applicable. The check boxes next to the quantities let you switch between a percentage and a set amount.
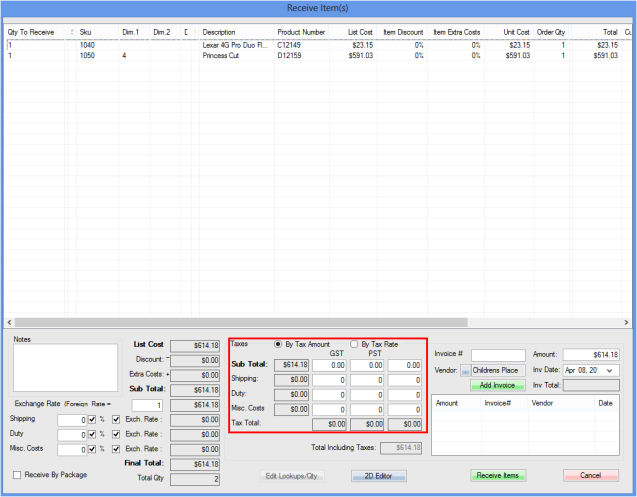
7. Use the Taxes box to view and edit tax information. Use the selectors at the top to select whether you would like to edit by dollar amount or by rate, and then enter the new amounts into the fields.
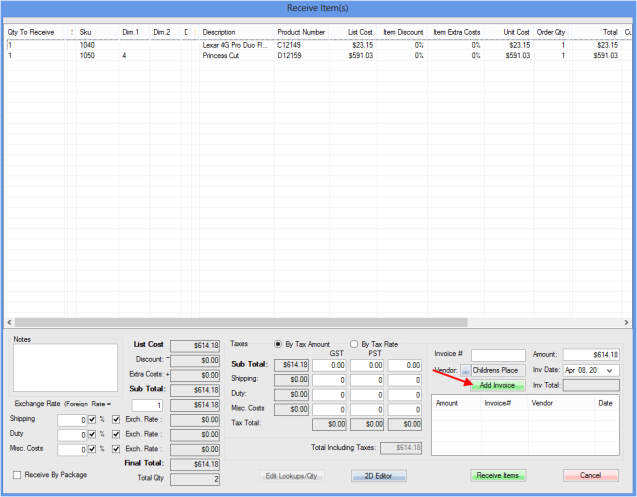
8. Once you are satisfied with your quantities and amounts, you can press Add Invoice to add an invoice for your order to your vendor list for payment later. For a more detailed overview of tracking the purchase order invoices see the article HERE.
9. Finally, press Receive Items to set the items as received.
10. Another new window should appear, this one being the Post screen. This is the final step in your order.
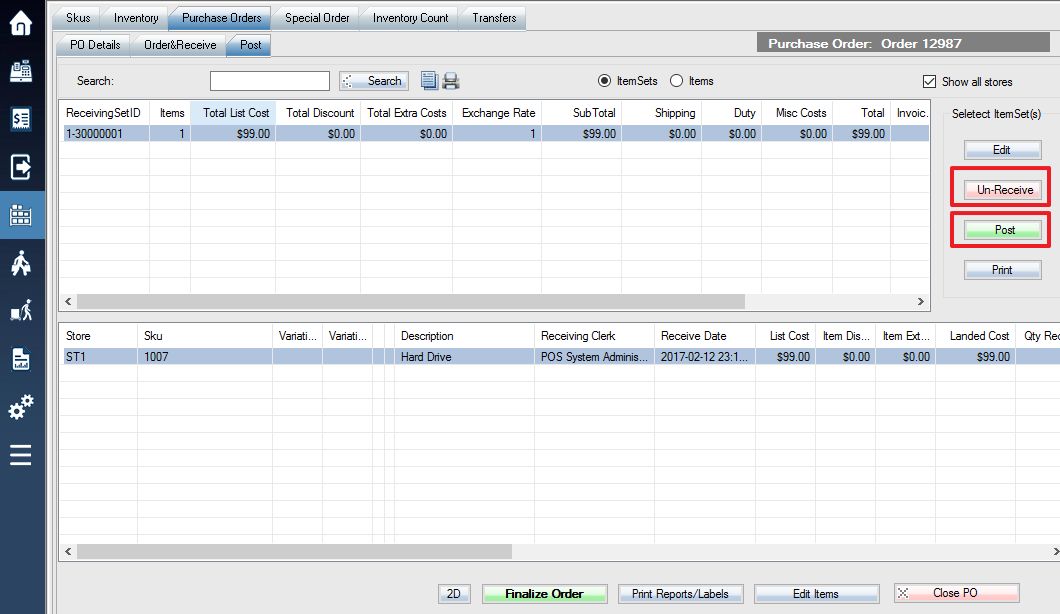
11. Select the receiving set in the top window, which will make the items in that purchase order display in the lower window. Make one final check that all items and quantities are correct, as the next step is not reversible. If any corrections need to be made, press the Un-Receive button.
12. If you do not need to make any corrections, press Post button.
13. Several different warnings will pop up, asking if you are sure you wish to post and if there are no items left on the purchase order you will also be prompted to finalize the order. Once you finalize, the order is complete and can now be closed.