Dayend (End-of-day process) is required for everyday business. The Sales Summary reports are depended on the day end process.
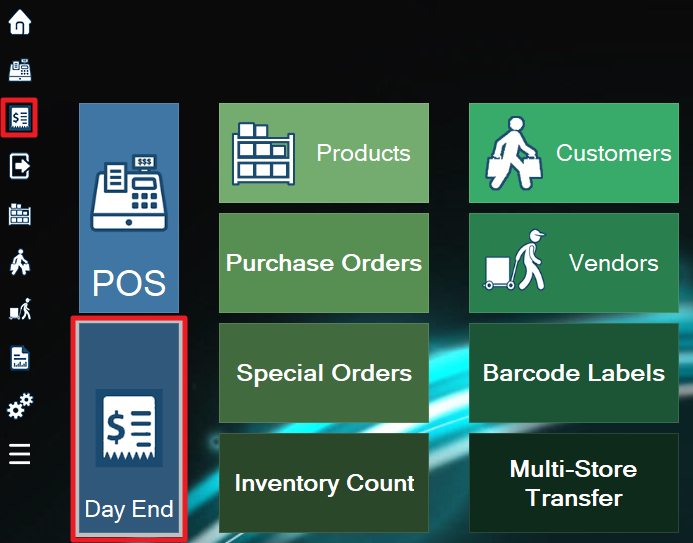
Log in to WooPOS and then select the “Day End” icon on home screen.
1)Select day end options, 2) cash out till and enter cash totals, 3) enter payment amounts, and 4) save totals.
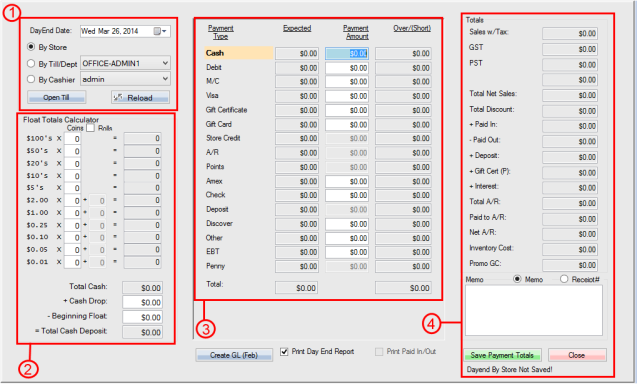
1. Day End Options
Enter the date whose day end you would like to view/update, then select whether you would like to view the day end for the entire store, by till, or by cashier.
Make sure to press the reload button every time the options are changed.
You can also use the Open Till button here to open the till for the next step.
2. Cash Totals
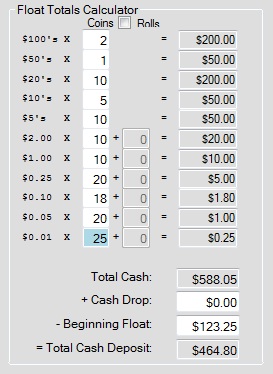
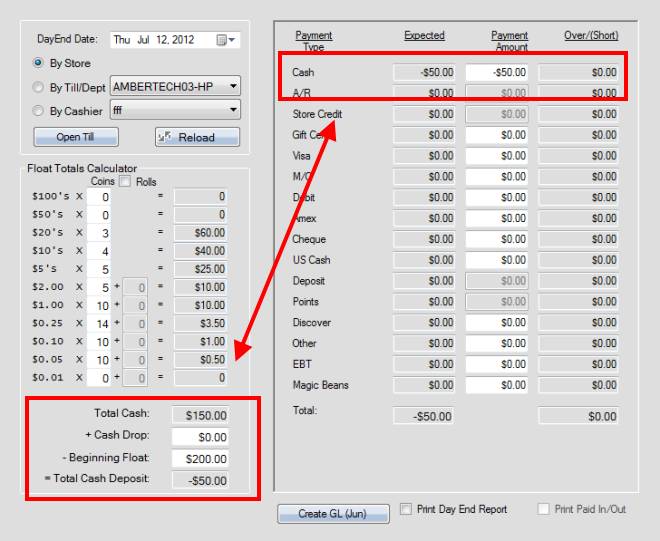
Sort and count the cash in your till, then enter the quantity of each type of bill or coin (not dollar amounts) into the fields. If you have coin rolls within your till, check the box at the top of the screen to enable the middle column, then enter the quantity of rolls in those fields. Enter any cash drop amount into the “+ Cash Drop” field below the totals, then enter in your beginning float amount (the cash amount that will always remain in the till) into the “- Beginning Float” field. The last field will display your total cash deposit for that day.
The bills and coins type can be setup by country.
3. Payment Amounts
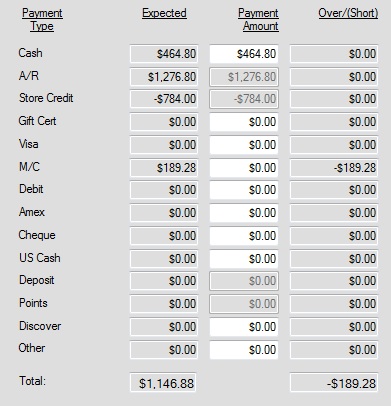
Each payment type setup in your store will be displayed here with three columns beside them. The first column, labelled “Expected” will display the amount of each payment type you should have at day end. The second field, “Payment Amount”, is where you will enter your actual day end totals of each payment type. Finally the “Over/Short” column will display whether your entered payment amounts are over or short of the expected totals. If you are in balance, the Over/Short column will display zeroes. (In the example picture the Cash amounts are balanced, as are the A/R and Store Credit fields (which are entered automatically) but the M/C account has no payment amount entered yet, and therefore is short.)
4. Day End Totals
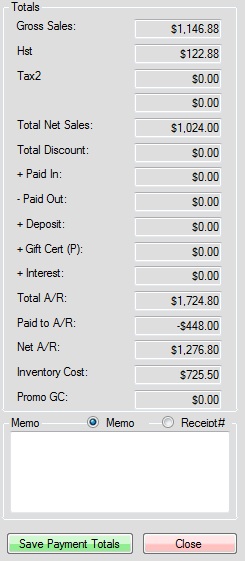
The box on the right side of the screen will display all your day end totals, and is automatically updated as you enter your information into the other sections. You can use the memo field on the bottom of the screen to enter a note which will be displayed on your day end report. Once you have completed entering your day end information select the “Save Payment Totals” button at the bottom of the screen.
How to Cash Out During Day End
Open the cash drawer and remove ALL cash. Count ALL cash in the drawer and use the left side of the day end screen to record your amounts (see step 2 above). Once you have finished counting the drawer, remove the exact amount of money that was in the register at the start of the day (your starting float). Typically this will be a mix of smaller bills and coins, in order to make change with the next day. Put this float amount back in the cash drawer and record that amount under beginning float on the day end screen. The amount of cash you have remaining is your cash deposit for the day. Enter this amount into the cash field of the expected column in the middle of the day end screen (see step 3 above). Always make sure that you count out the amount from your beginning float FIRST, and then use the remaining cash as your cash deposit.
If your float is short: If you started the day with more cash that you have at the end, you still do your day end the same way. For example, if your beginning float was $200, but the only cash transaction you had that day was a return where you gave back $50, then your drawer will be left with only $150. You will still put $200 into the beginning float field, because that is what you started with. This will make the total cash deposit field a negative number, but that is fine because a negative number is what you actually took in and it will match the expected field (see picture below).
Print Day End Report
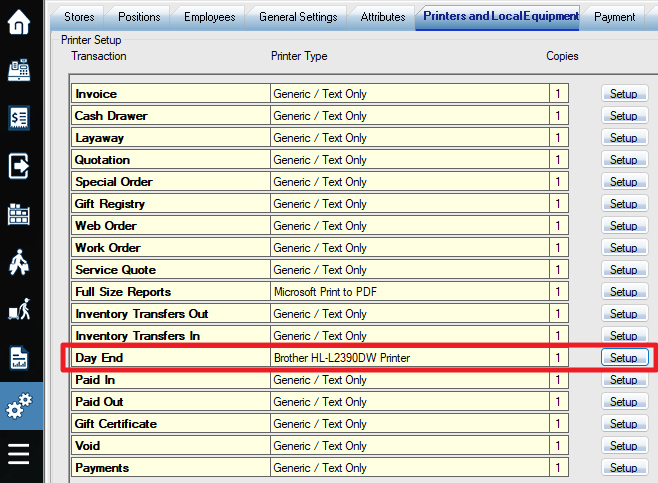
Please set up the printer for day end.
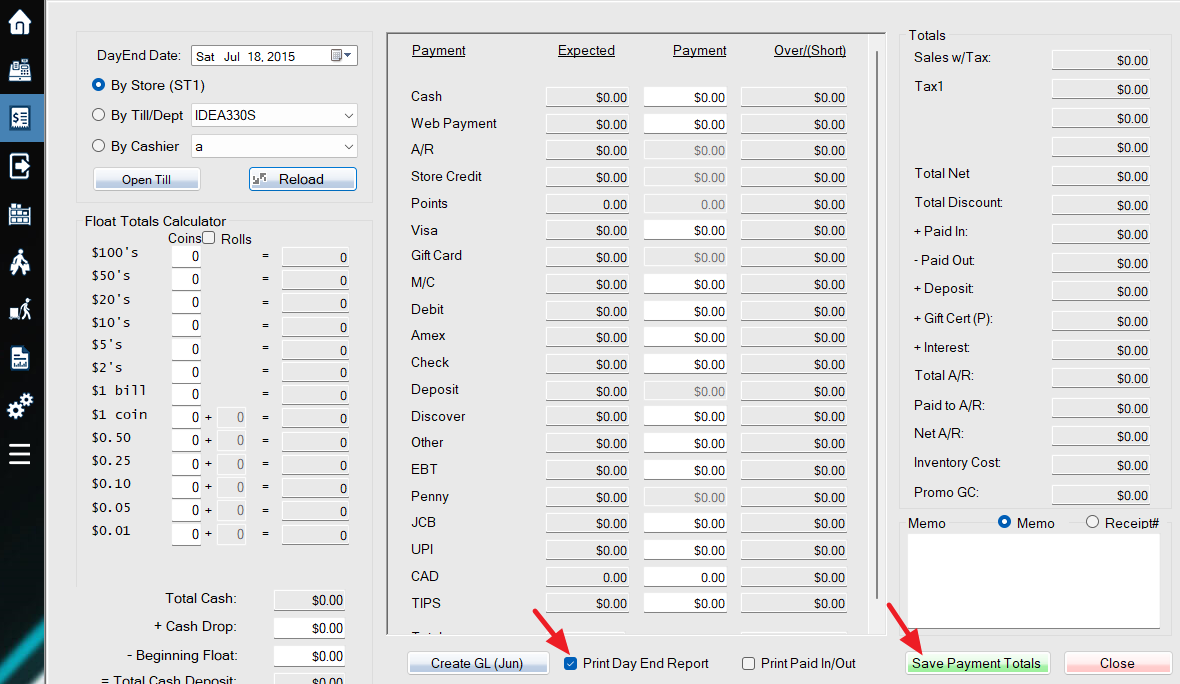
Check on “Print Day End Report” and click the “Save Payment Totals” button.
If you have created general ledger account, general ledger files for QuickBooks, Sage Simply Accounting, or PeachTree will be created automatically under C:\WooPOS\GL_OUT folder. You can create monthly general ledger files by using the Create GL(month) button at bottom of the screen.