Using the printer setting window you can specify which printer will print each type of document (invoices, day end, etc).
Before adding printers to WooPOS, please install printer drivers (if needed) and print a test page in the printer properties setting to make sure the printer is working properly.
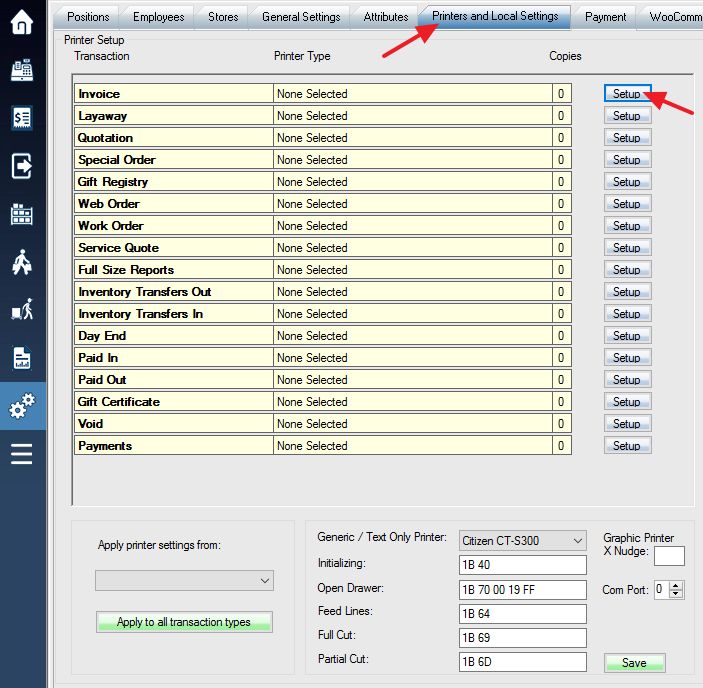
Log into the system, and then access the Setup menu. Select Printers and Local Equipment tab to set up the printer.
Select the one you wish to change, and press the Setup button.
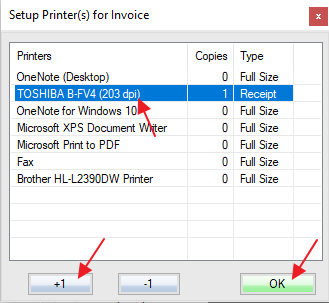
This will bring up a menu listing all installed printers on your computer. Select the printer you would like to use, and use the “+1” button to select the number of copies you would like printed by default. You can select multiple copies and/or printers if you would like.
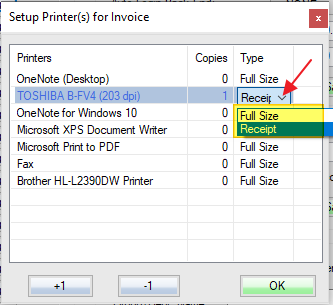
Select “Full size” for a letter-size invoice. “Receipt” for 3-inch or 2-inch receipt.
To apply the settings from one transaction type to all the others at once, use the drop-down menu to select the type of printer setting you would like to apply to the others, and then press the Apply to all transaction types button to apply the settings.
![]()
This will be the result after applying printer settings to all transaction types.
![]()
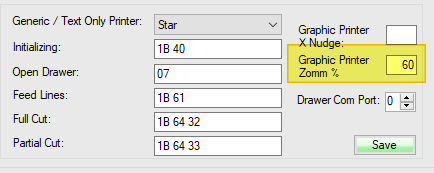
Optional: set zoom to 60% for a 2-inch (58mm) receipt printer.