1. Login into the system and access the Products menu.
2. Locate the product and click Edit Selected Item:
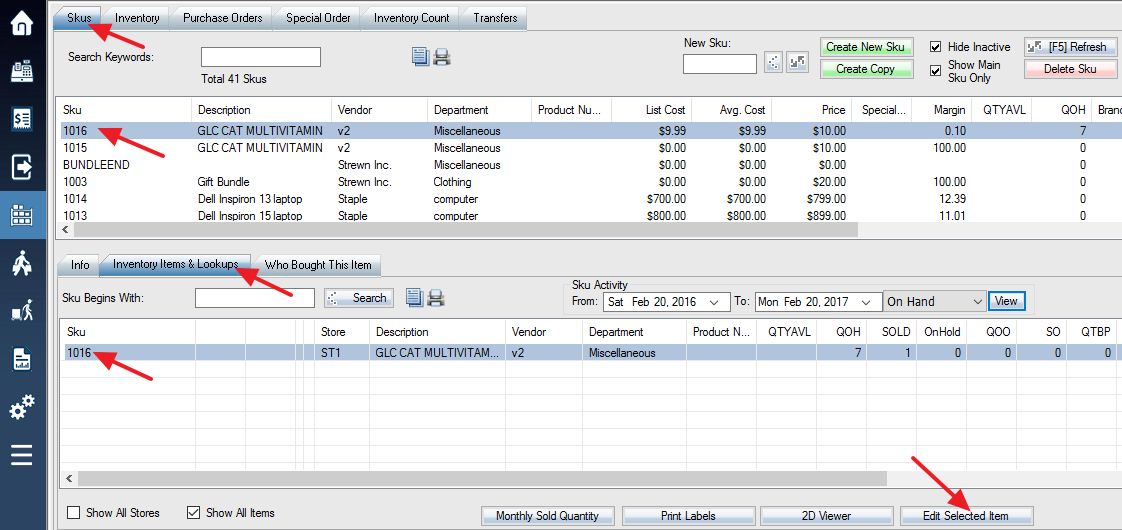
Step 1: Select the SKU you wish to do an In-Store Location Inventory Adjustment on from your SKU list.
Step 2: Select the Inventory Items & Lookups tab.
Step 3: Under the Inventory Items & Lookups tab, select the SKU variation that you wish to do an In-Store Location Inventory adjustment for.
Step 4: Select Edit Selected Item in the bottom right corner.
3. Overview of adjusting the quantity on a single SKU between Locations:
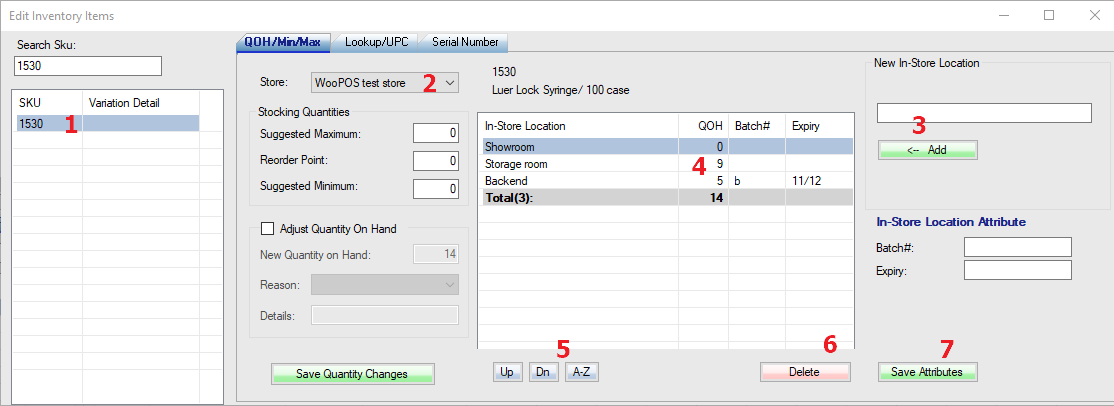
<1>: Select SKU or variation
<2>: Select Store
<3>: Add a new location
<4>: Change quantity on hand
<5>: Change display order
<6>: Delete selected location
<7>: Save attributes of the selected location
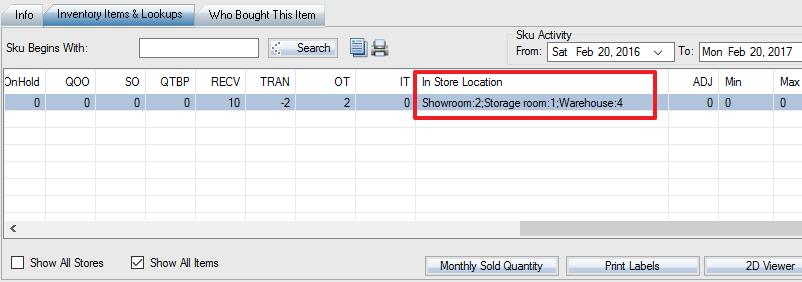
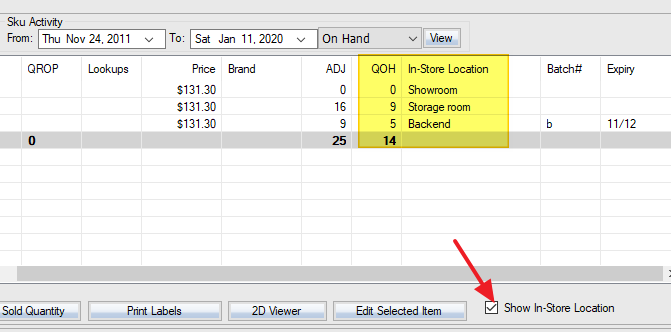
4. You can expand the In-Store Location column as shown below to display the QOH of each individual location.
5. Check on “Show In-Store Location” to show locations in multi-line.
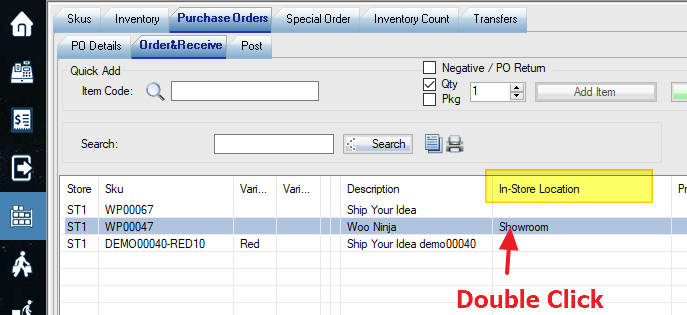
6. In POS front end, Purchase Order, and Inventory Transfer screens, locate the “In-Store Location” column and double click an item.
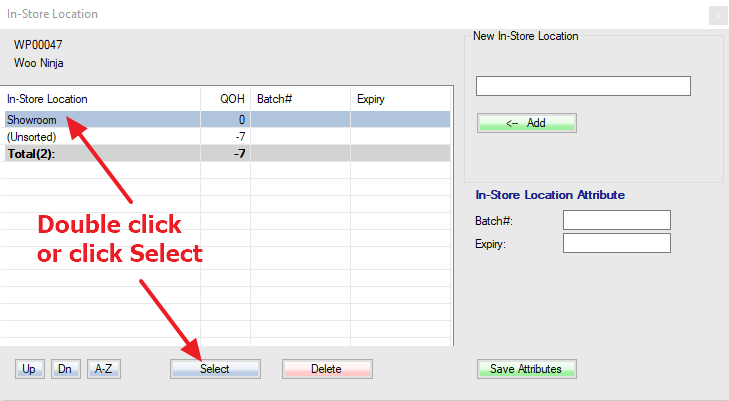
To change location, select a location from this screen.
7. For batch number, lot number and expiry date management, use the translation feature to change the name “In-Store location” to “Batch”, “Lot” or “Bin”.
“In-Store Locations”=”Batches”
“In-Store Location”=”Batch”
“Location Name”=”Batch Name”
“Location:”=”Batch:”
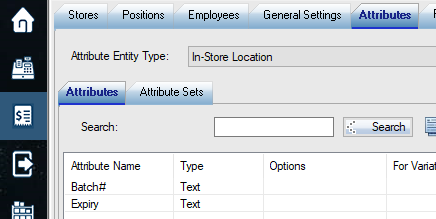
8. Add attributes for more information tracking or sorting. Attributes will be listed in the inventory tab (see the right side of the screenshot in step 5).