WooPOS Point of sale software will help you to set up complicated city and county taxes in the United States. You don’t need below steps if you set up taxes by city or by zip code.
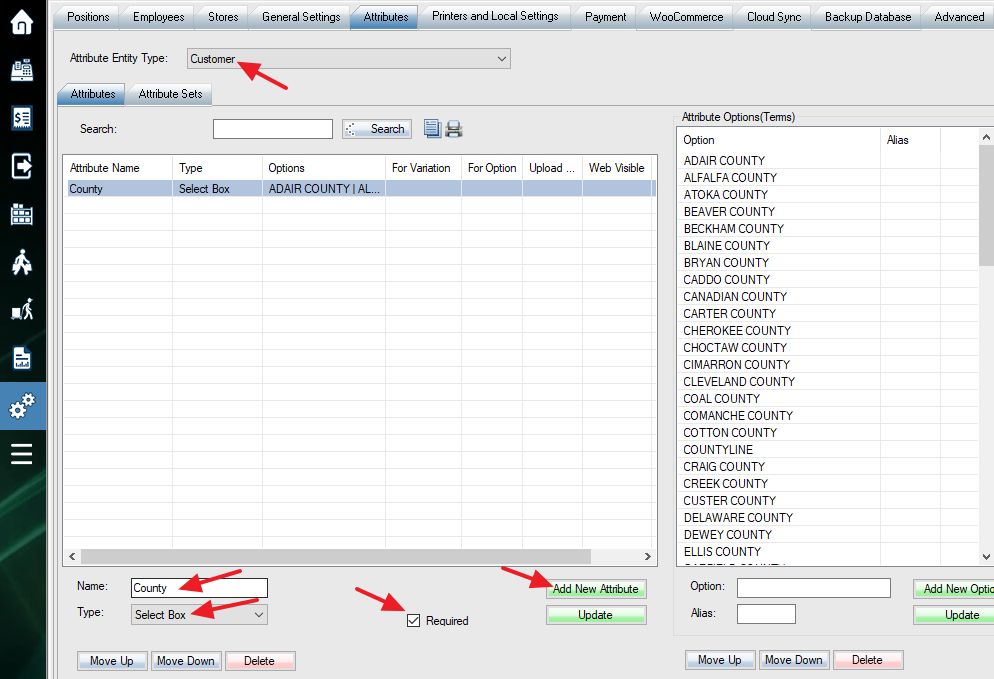
Add an attribute called “County” in customer entity type. Add the list of counties as options on the right side.
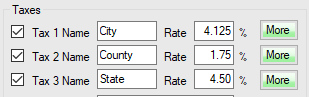
Go back to stores setting, set up taxes. One of the tax names must be “County”.
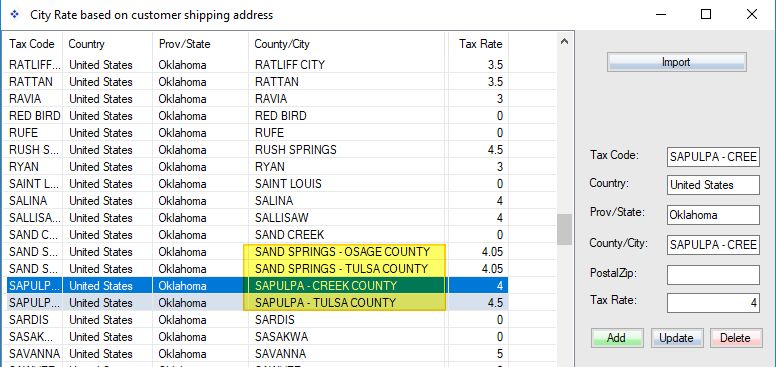
Click the green “More” button beside city tax, select “Advanced Tax Rate”. Import the tax rates. Add “-” and county name if tax rates are different in the same city.
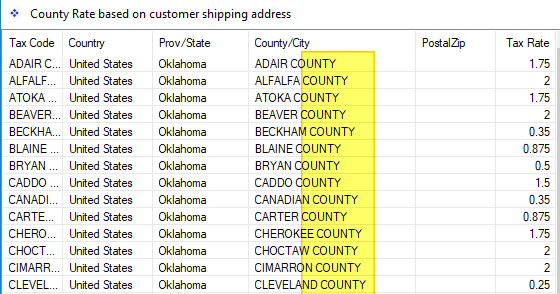
Click the “More” button beside county tax, select “Advanced Tax Rate”. Import the tax rates. Add “County” at the end for county name.
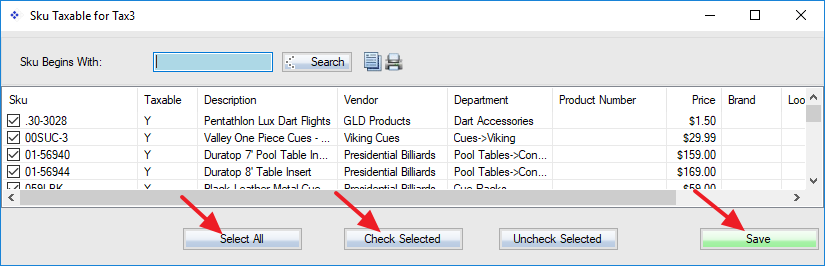
Turn on “Sku taxable” for all products if needed.

When adding a new customer, the county is required.

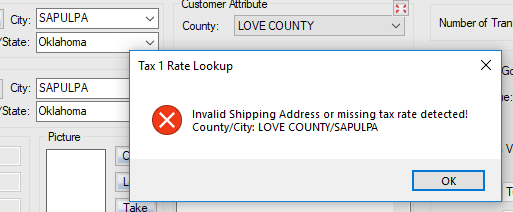
You should get a warning message when the wrong county is selected.
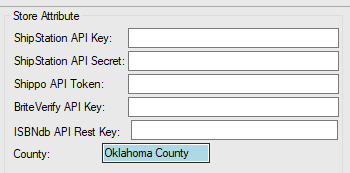
Add an attribute named “County” in store entity type.

Setup the attribute “County” in the stores setting. This county will be used when selling to the default “Thank you” (walk-in) customer or for store pick-up (non-shipping or delivery) order.
Setup tax exemption rule for service and labor if needed. You can build a query based on the product department or customer type (Reseller, WholeSale). You can also set individual SKU or customer taxable.
Please make a sale and double check taxes.
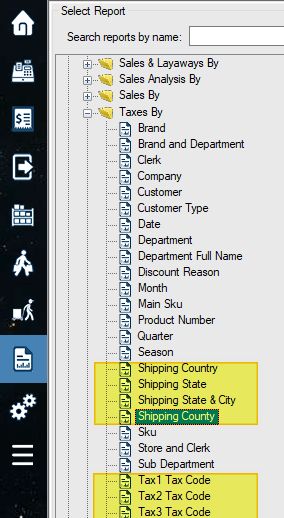
Sales and taxes report can be found in the report section.
Related switches 042,043.
Related article:
Change Tax During Transactions
Advanced Method for Tax Exemption