*This exercise is designed to guide you through a variety of fundamental functions in WooPOS so that you may learn about this software through both reading and application. There are tons of articles written that answer your questions, which can be accessed through the online Knowledge Base. If you have any questions during the exercise, please feel free to ask your manager or other Support or Install Reps.
If you want to run multiple databases on the same PC, check here:
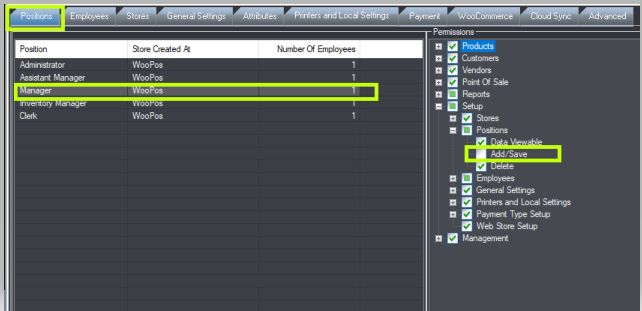
2) Click on the ‘Setup’ tab ![]() and then the ‘Position’ tab and create the 4 positions below with the permissions specified:
and then the ‘Position’ tab and create the 4 positions below with the permissions specified:
A) Manager
Give ‘permissions’ for everything except for ‘Add/Save’ under ‘positions’, and ‘Add/Edit Employees’ under ‘Employees’ both under ‘Setup’.
B) Assistant Manager
Give permission for everything except for ‘Setup’.
C) Inventory Manager
Give permission for everything except for ‘Setup’, and for Time Card Management under ‘Management’.
D) Clerk
Give permission only for ‘Point of Sale’.
3) Create employees in each position under tab ‘Employees’, all with different names. Make sure to click the ‘New Employee’ button before entering information so that you don’t overwrite the settings for the admin employee who is already in the system.

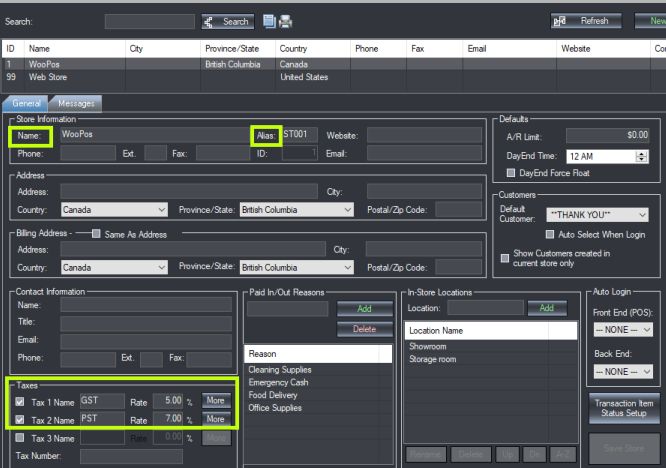
4) Setup your store with the following information:
- Store Name (You can create a name for your store)
- Store Alias (Can be up to 5 characters and comes in handy when there are multiple stores)
- Make Tax1 GST at 5%
- Make Tax2 PST at 7%
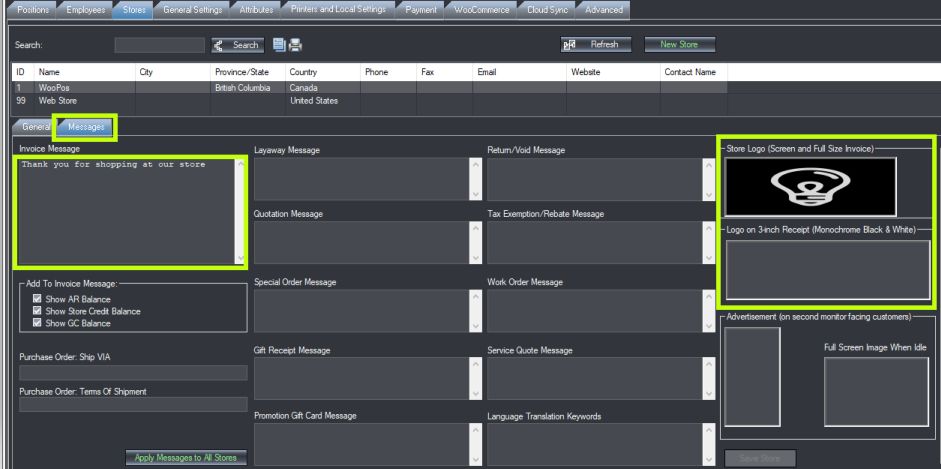
5) Create an invoice message, under the tab ‘Messages’ and add a logo image to the full-size invoice as well as the receipt. You can use Paint.net that is installed on your computer to create a logo for your test store. There are two different sizes on each receipt so be sure to put in the right size. If you hover over the rectangles under the titles you can see the sizes.
6) Create 4 reasons under Paid In/Out Reasons under ‘General’ tab. Use the following reasons:
- Cleaning Supplies
- Emergency Cash
- Office Supplies
- Food Delivery

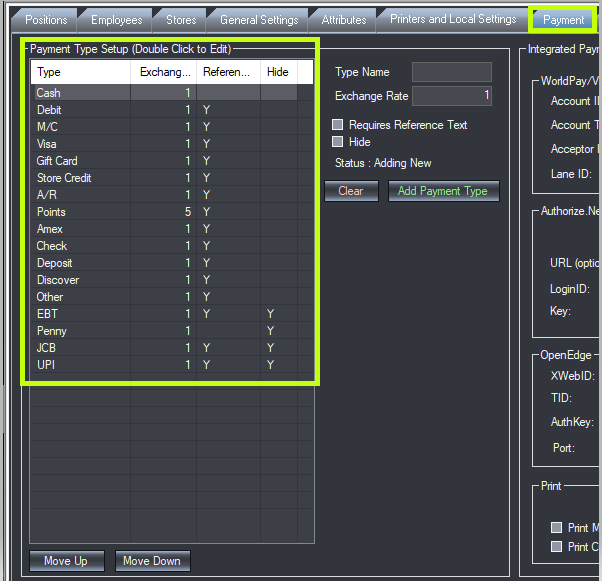
7) Arrange your payment types in the order listed below. The top 8 will be displayed in the POS payment window and also in the payment summary report. Also, please go to payment summary report and you’ll see that the payment types are in the same order that you have arranged them.
- Cash
- Debit
- MC
- VISA
- Gift Card
- Store Credit
- A/R
- Points
- And so on…
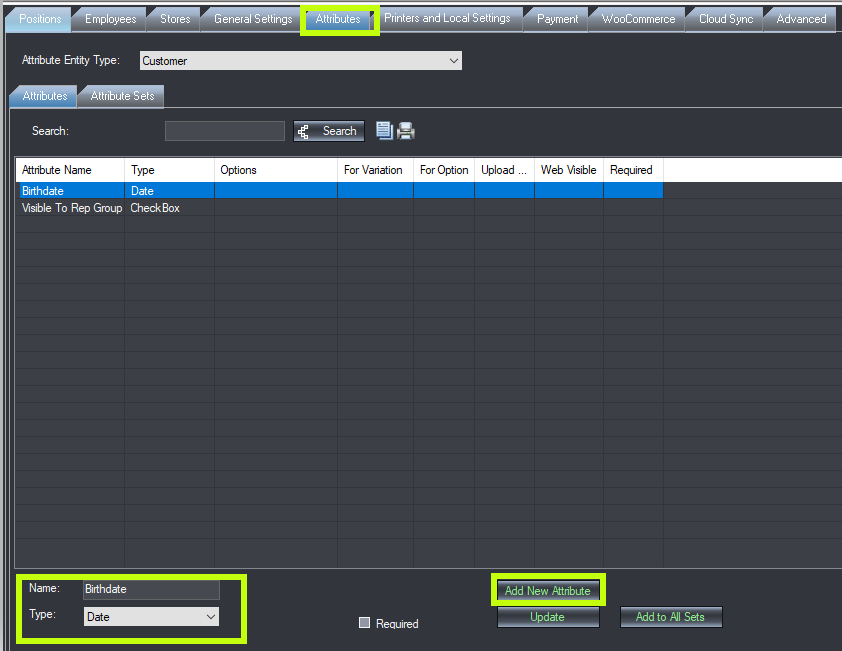
8) Create an attribute for customers called “BirthDate” with a date format.
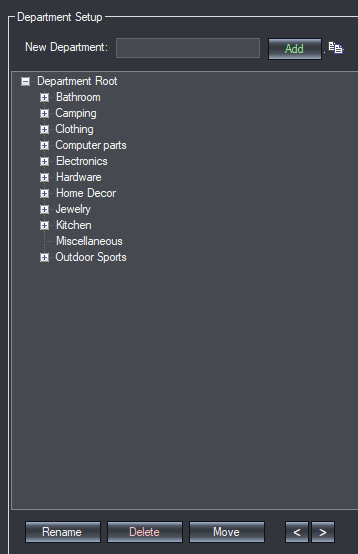
9) Create 10 different departments under ‘General Settings’ tab with 3 different sub-departments in each.
Use the following departments and use your creativity to come up with the sub department.
Example:
Clothing (Department 1)
- Sub department 1
- Sub department 2
- Sub department 3
Electronics (Department 2)
- Sub department 1
- Sub department 2
- Sub department 3
Other departments: Hardware (Department 3), Computer Parts (Department 4) , Jewelry (Department 5), Home Décor (Department 6), Kitchen (Department 7), Camping (Department 8), Outdoor Sports (Department 9), Bathroom (Department 10)
*Note that you can create a sub-sub-department as well, though most of our reports only go down to the sub-department level.
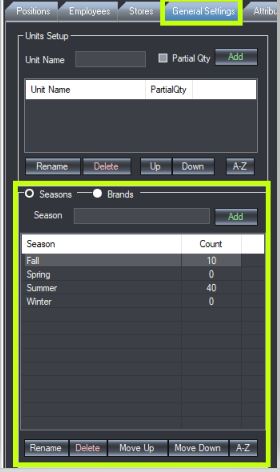
10) Create 4 seasons under ‘General Settings’ tab
- Summer
- Fall
- Winter
- Spring
*Note that when you create SKUs in question #21, you need to attach a season to all SKUs in the clothing department.
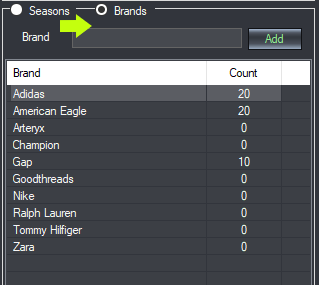
11) Add 10 different brands for the clothing industry to the Brand section by moving the circle checked from ‘seasons’ to ‘brands’.
*Note that when you add a SKU in the clothing department in question #21, make sure to link a brand to that SKU.
12) Create 5 different vendors with all information filled in including at least 1 contact each. Select the ‘vendors/suppliers’ tab ![]() on the left side.
on the left side.
You can use your creativity to choose these vendors and make up the names for the contacts. Choose real places/businesses for the vendors and find the addresses etc. by searching online.
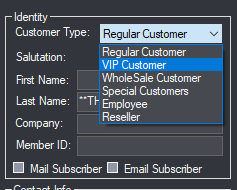
13) Create 10 different customers, 6 with company names and 4 without from ‘customers’ tab ![]() on the left side. Make 6 customers VIP customer types. You can use your creativity to come up with the customer and company names.
on the left side. Make 6 customers VIP customer types. You can use your creativity to come up with the customer and company names.
14) Fill in the ‘Birthday Attribute’ for each customer. You can make up their birthdays.

15) Create 5 different attributes for ‘products‘.
Size, color, jewelry size with “for variation” check on.
CPU, RAM with “for variation” check off.
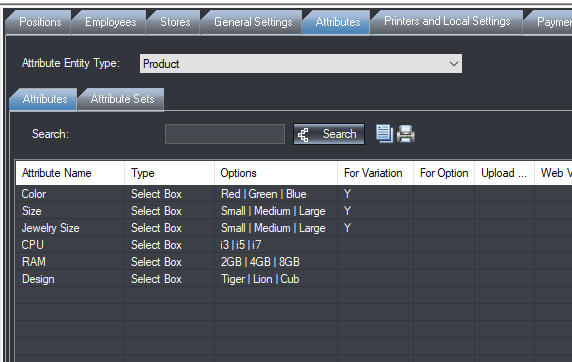
16) Add options for each attribute.

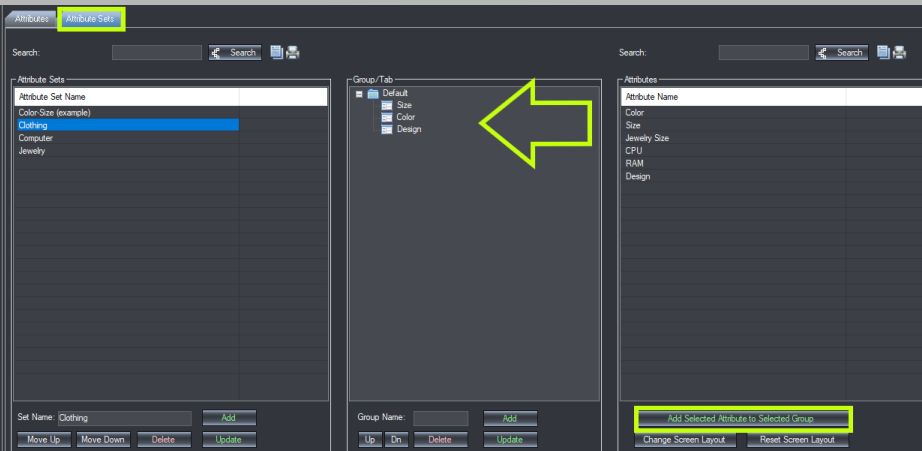
17) Create 3 different attribute sets: Clothing, Computer, and Jewelry. Add proper attributes to ‘Attribute sets’ and ‘Group’.
18) Create 10 different SKU items in the following departments by going to the ‘Products/Inventory’ tab ![]() on the left side, select attribute set as needed:
on the left side, select attribute set as needed:
- 2 SKUs in the Clothing Department (select attribute set with size and color variations, and attach a brand and season for each SKU);
- 2 SKUs in the Electronic Department (no attribute set necessary)
- 2 SKUs in the Hardware Department (no attribute set necessary)
- 2 SKUs in the Computer Parts Department (select Computer as attribute set)
- 2 SKUs in the Jewelry Department (select attribute set with jewelry size variation for each SKU)
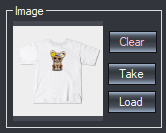
19) Add an image from Google into every item. Take pictures from the computer camera, add to products.
20) Apply one tax to the clothing industry items (GST).
21) Select different season, brand and vendor for each product.
22) Create 5 purchase orders of various items and customers from ‘Purchase orders’ tab on the top.
Receive 3 of them and post some of them.
23) Create 10 POS sales transactions of various items and customers. (Create an invoice, Sales return, park, layaway, special order, and quotation transaction.)
24) Print one copy of each type of transaction on the laser printer. Use PDF printer if you don’t have a printer.
25) Create 3 transactions that are paid with AR and then pay off the AR with VISA as a payment type.
26) Do a refund of a transaction and put the amount into Store Credit for a customer (not Thank-You customer).
27) Save day end ![]() with a $300 cash float.
with a $300 cash float.
28) Punch in and out, and then adjust the time for 8 hours of work.
29) Query the “Transaction Details” report by “Department” then choose “Clothing” and add that to the favorite report button.
30) Print a receipt with an invoice Message that says “Thank you for shopping at our store, please come back soon”. If no printer, you should be able to view receipts in c:\woopos\receipt folder.
31) Create a discount rule: All SKU’s 50% discount for all VIP customer type customers.
32) Create a points reward program, 1 point for every 5 dollars.
33) Create a points adjustment SKU and then create a points adjustment rule that allows the points adjustment SKU to add or remove points from a customer’s profile based on the quantity sold in either a positive or negative quantity during a sale.
34) Use these five UPC numbers and attach them to the Lookup/UPC of your first five SKUs.
- UPC1: 957483647364
- UPC2: 986483644376
- UPC3: 473213644938
- UPC4: 234548364736
- UPC5: 546483326669
35) Create a Special SKU and then do a transaction with that SKU making up a description and price for a special product.
36) Create a jewelry label, Hold CTRL key to print on the screen.
37) Export SKU list and modify the list in Excel and import back.
Congratulations you have now completed the tutorial exercise for WooPOS Software!
Feel free to browse around KnowledgeBase and Forums to keep learning about the software.