

Forum Replies Created
-
The new category created in WooCommerce will automatically show up in WooPOS. The products with categories changes in WooPOS will be pushed to the web (WooCommerce) automatically. You don’t need to do anything.
You can create a consignment Sku:
You’ll need to create a new consignment Sku for a new customer, don’t re-use the Sku.The consignment report can be found in Reports–>Customers section.
Please get the upgrade to fix the negative amount problem you may have.
Please take a look at Reports -> Product -> Receiving History with the query “posted = true”.
There are two ways to delete variation Skus.
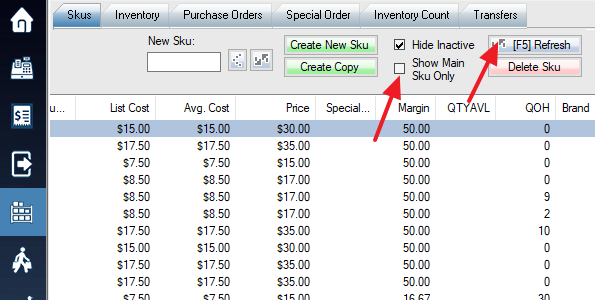
1. In Skus tab, Uncheck the “Show Main Sku Only” checkbox, and hit F5 or Refresh. Once the variation Sku shows up, just select the variation Sku and click “Delete Sku” button. After you deleted all variation Skus, you can delete the main Sku.
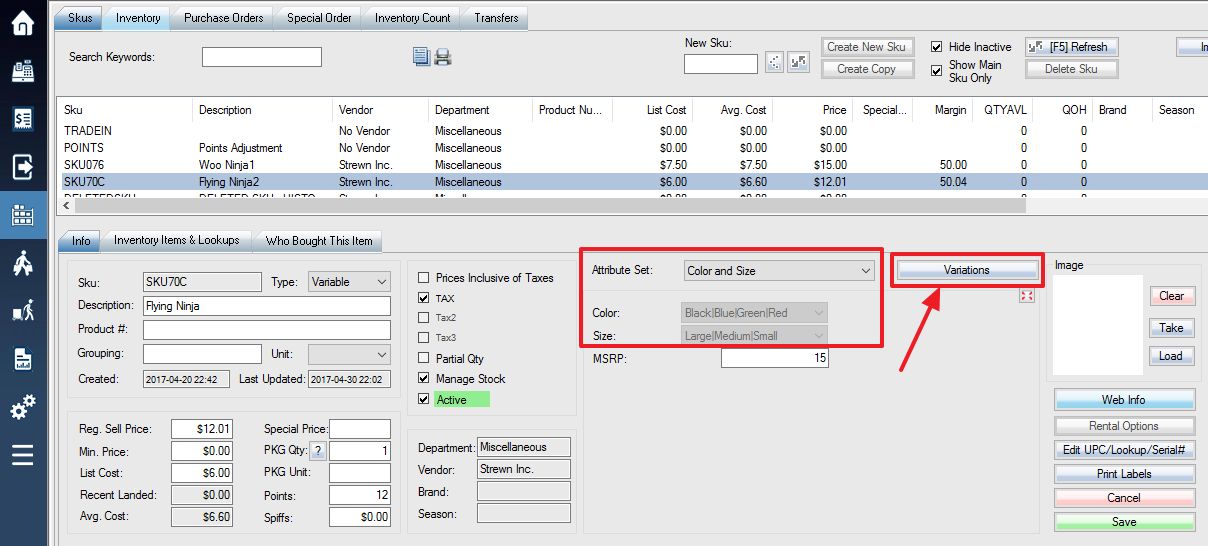
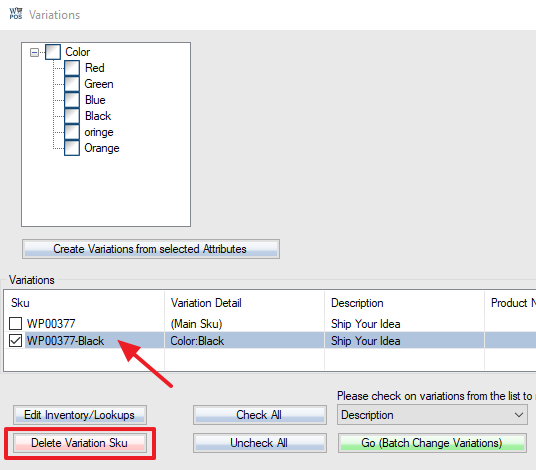
2. Click the “Variation” button in Skus Info tab, select the Sku to delete, click the “Delete Variation Sku” button.
You can just void the transaction with the wrong customer. And make a copy of the transaction, and select the proper customer and finish the transaction.
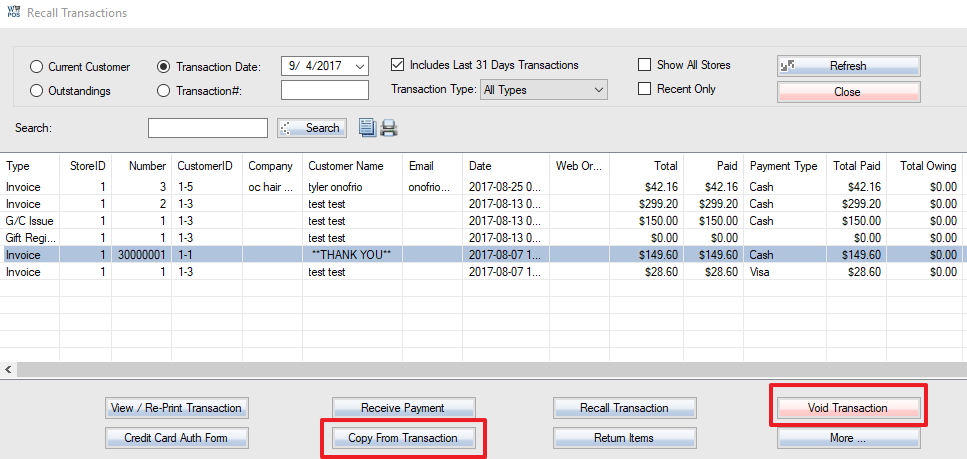
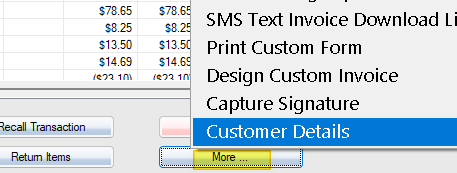
Or click the “More” button, select “Customer Details”. And select the customer you want to change to.
It’s recommended to backup your WordPress and WooCommerce website before enabling this option. But you don’t have to the backup. When you create a new product in WooPOS, you still need to go to “Web Info” and “Publish” the product. If you changed a web item information like price, description(title) in WooPOS, and you have the “Automatically upload online products when changes made in POS” option switched on, the item info will be uploaded to WooCommerce site automatically. Attributes will be uploaded, but departments won’t. For details, please check here:
Sorry, we don’t have the function now. You’ll have to manually control the price.
The WooPOS department and online category are different. One product can only belong to one department or sub-department, and it can belong to multiple categories. WooPOS only import online categories as departments initially. Please create the new category online (WordPress backend) and create the new department in WooPOS separately.
First set up attributes for CRM (select CRM in step 3)
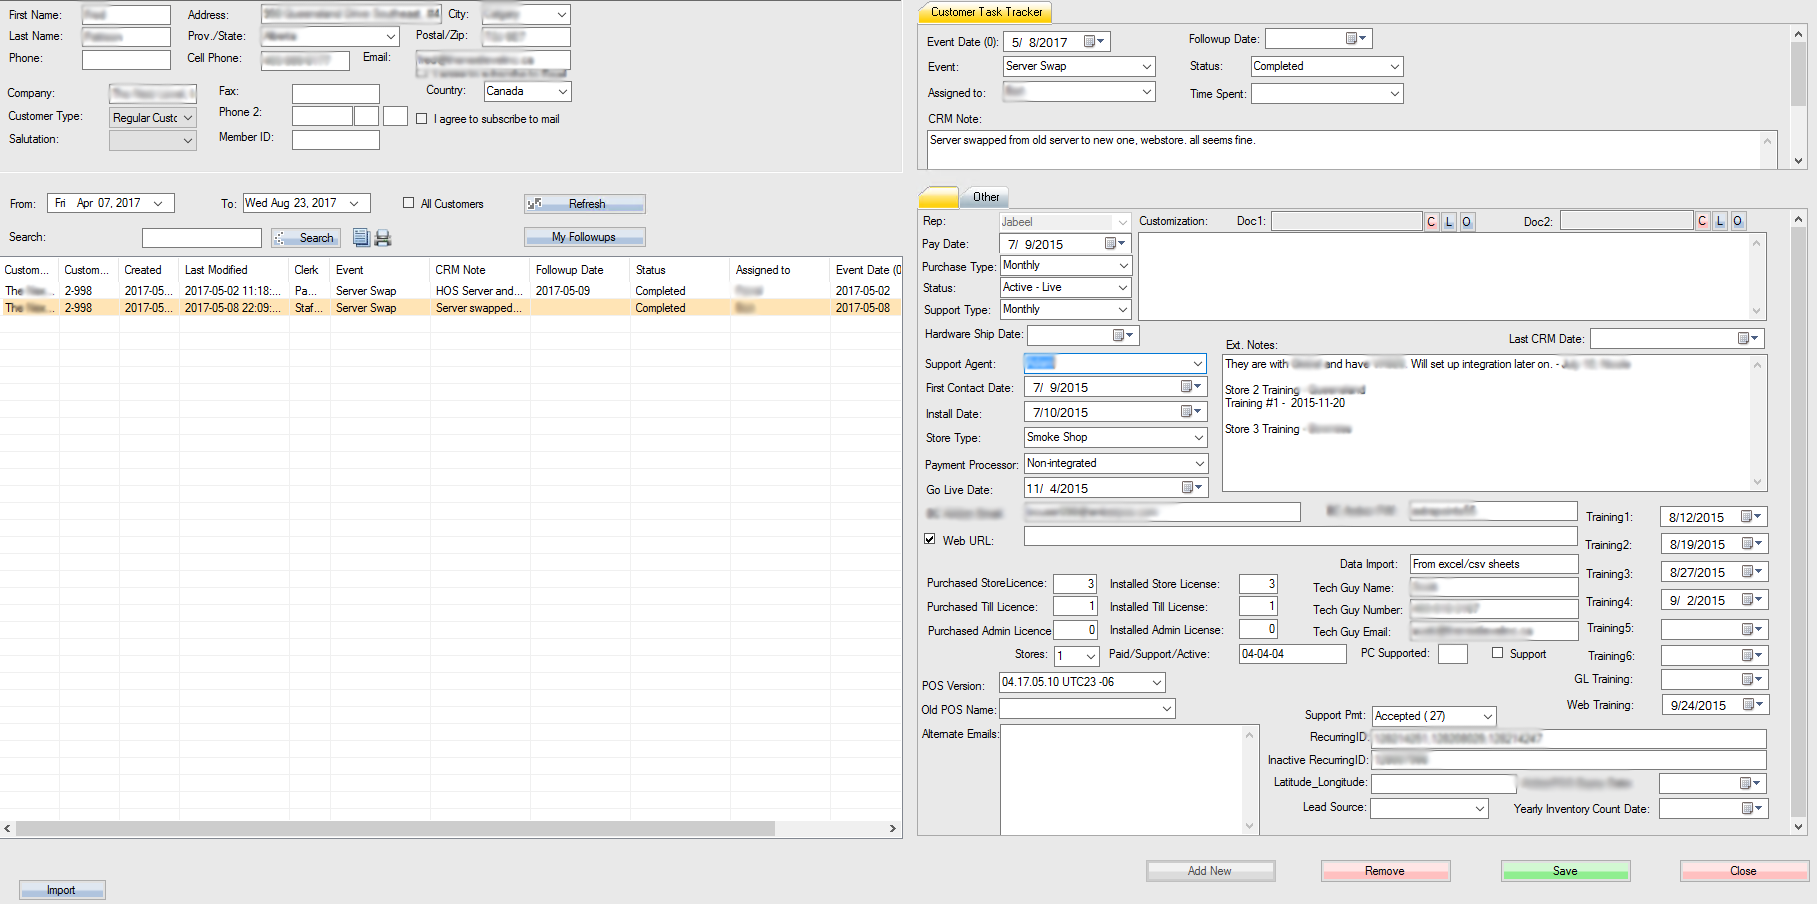
You can then click “F7 CRM” button at bottom-middle of the customer details screen to track CRM data.
Here’s an example of our own CRM screenshot. All fields are custom attributes. You can add your own CRM fields, columns, and screen layout.
Your products could have “manage stock” checked off, meaning service product, no inventory. Or the “Allow Back Orders” is on, meaning even if you have no stock, you allow back order, the front end will still show “in stock”.
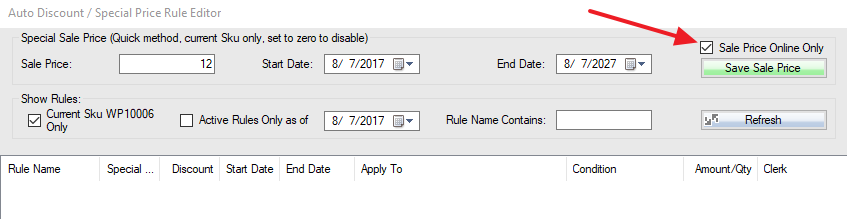
In the “Web Price +” box, just input a negative value, the WooCommerce price will subtract the amount from the WooPOS price. I’ve also added the on-sale price for online only function. Please get the upgrade.
You can import the counted list to inventory count or purchase order. Either way should work. In PO, you edit and track cost as well. If you don’t need to edit cost, use inventory count section will be quicker.
Here’s how to translate 3″ receipt:
if you have a receipt printer like this:
You can setup to print to this printer:If you don’t have a receipt printer, you can rename the printer:
and then select the printer to print:If you don’t have any printer, you can use Generic Text Only Printer. Note: Only watch the first half of this video. No need to setup printer command. Don’t set Generic Text Only Printer or receipt printer as default printer as Crystal reports will not display properly.
The receipt files should be in C:\woopos\receipt folder. You can Email text or PDF file to the customer.

